You can segment your leads in different stages in your leads section to help you better organize their information based on sales stages or customer profiles.
Creating segments also allows you to send targeted email campaigns to leads in that segment and assign permissions to document the document portal with more control (assign leads in only one segment, multiple segments, or all).
Follow these steps:
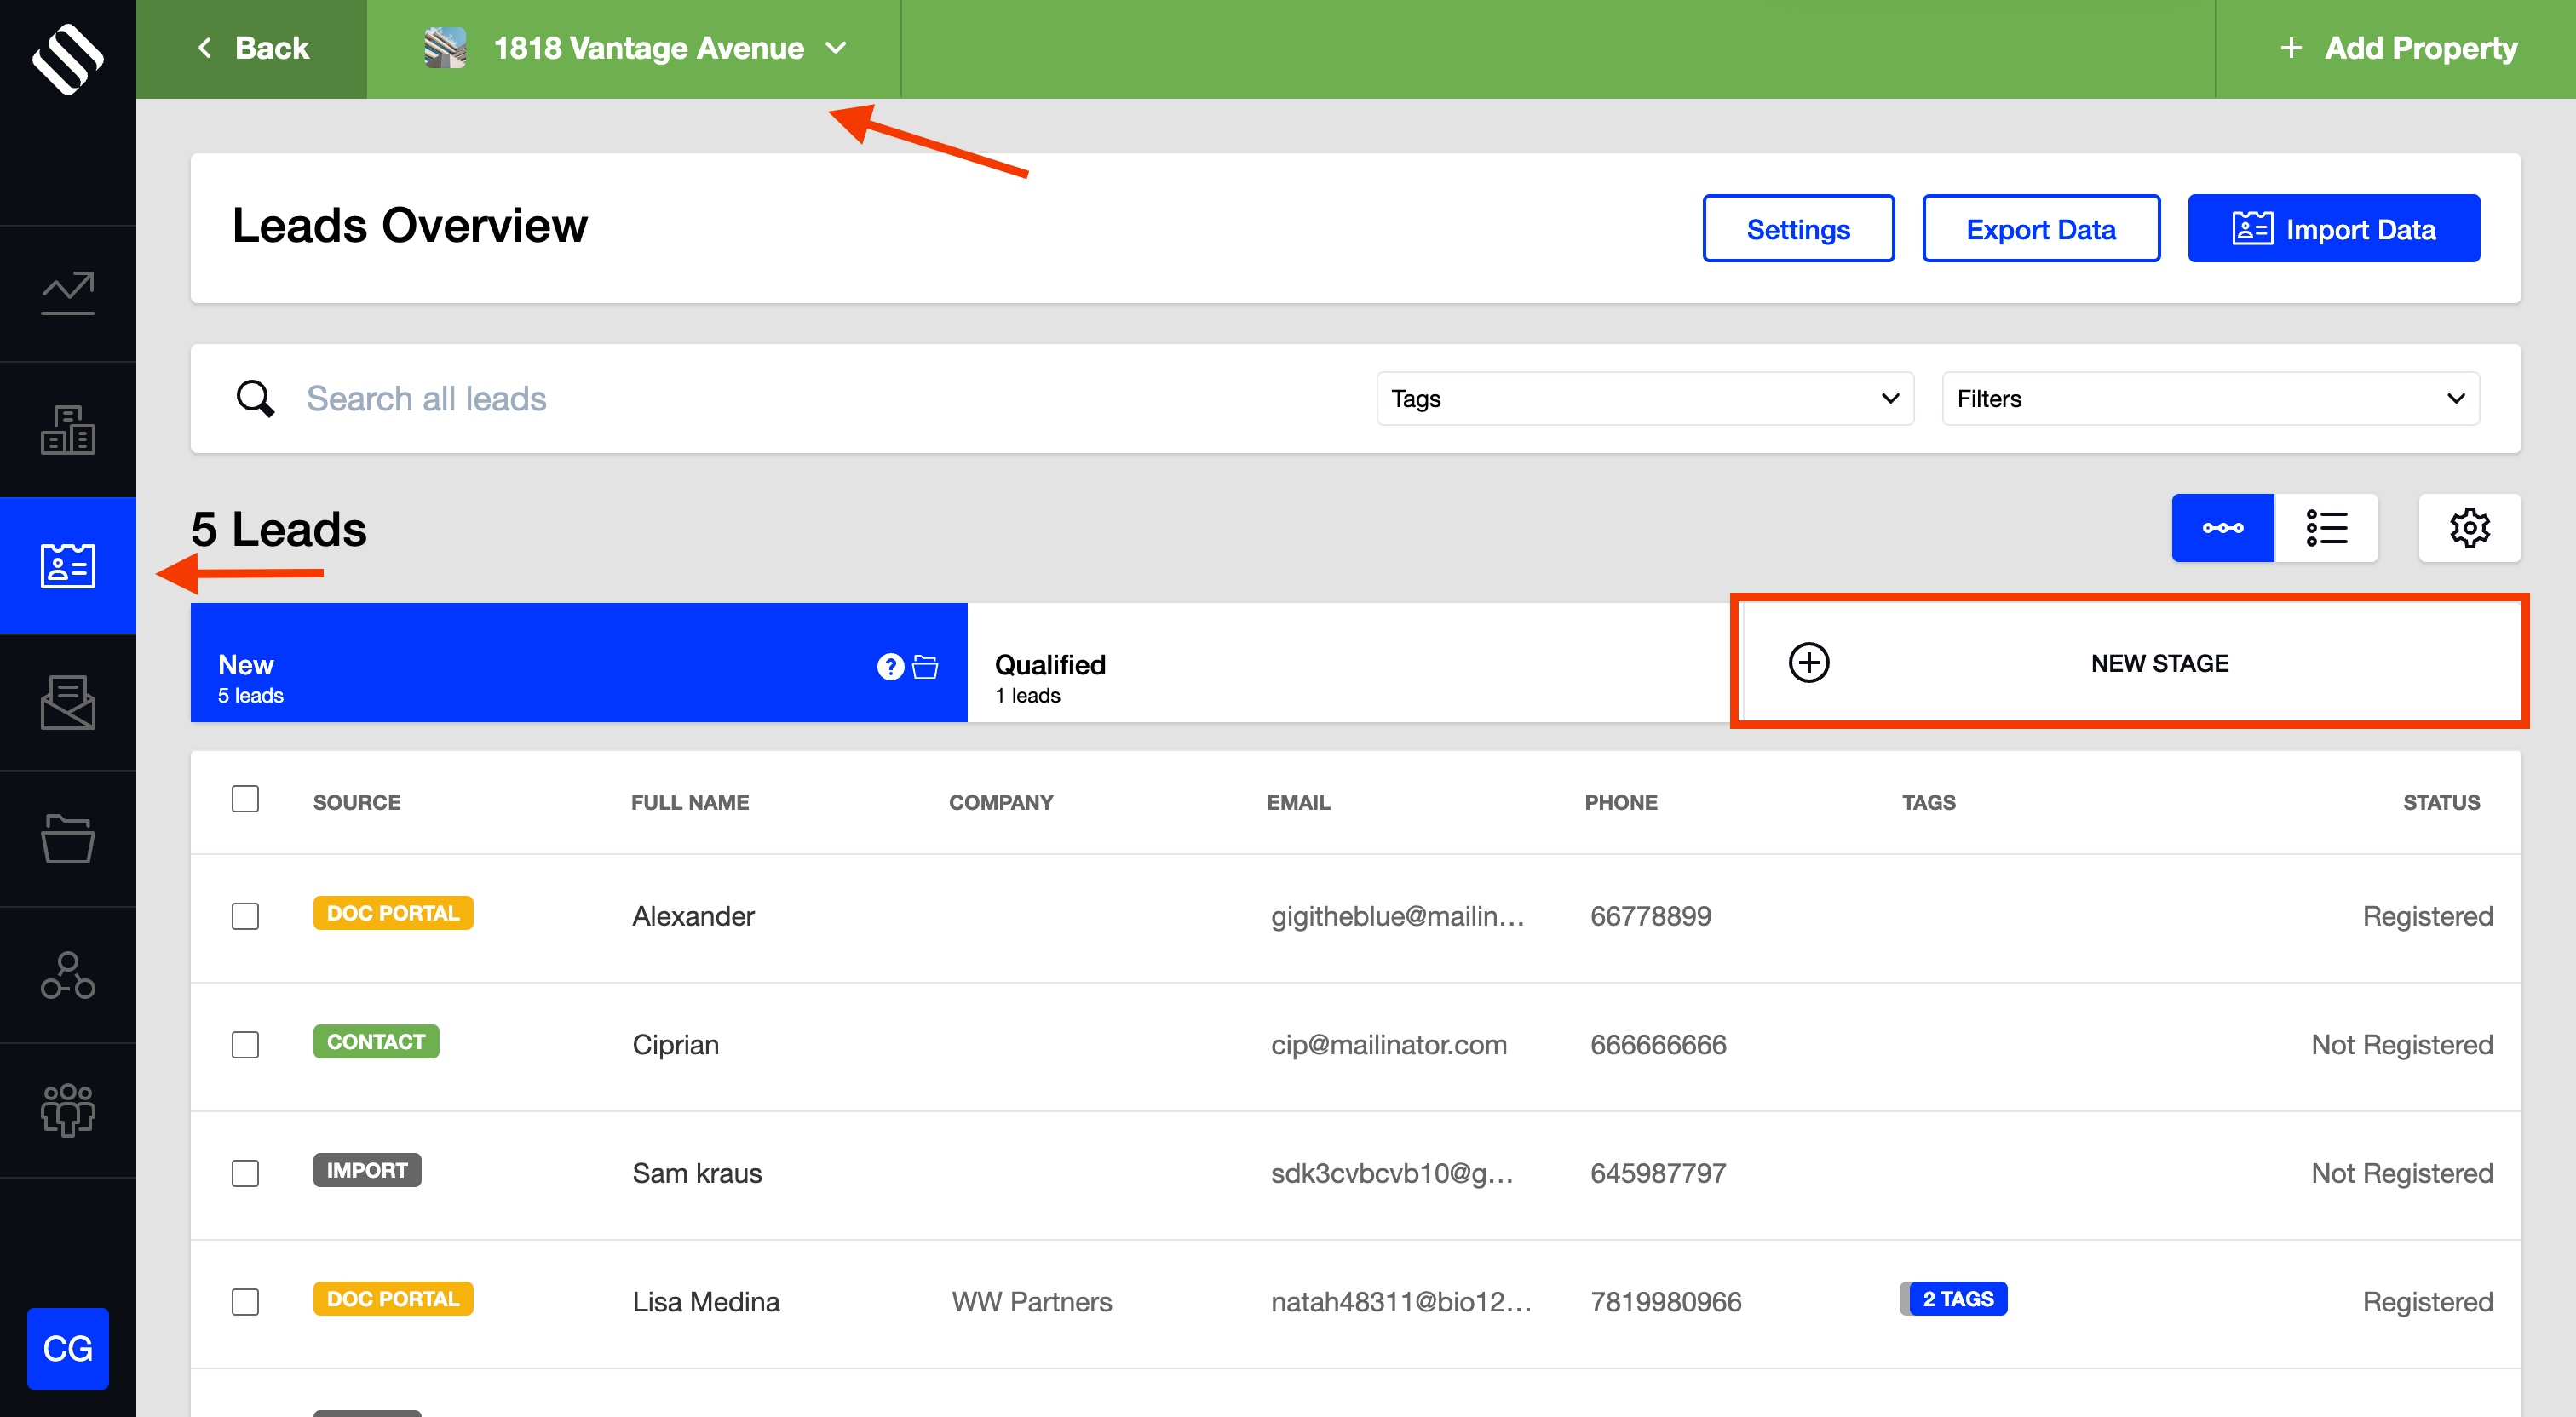
- Locate the “Leads” menu button on the left sidebar and access it
- Select a property from the drop-down menu located at the top
- To add a new segment: Click on the large “+” icon and create a name for the segment

- To edit a segment: Click on the right-side circles icon on any segment to change the name (or delete)

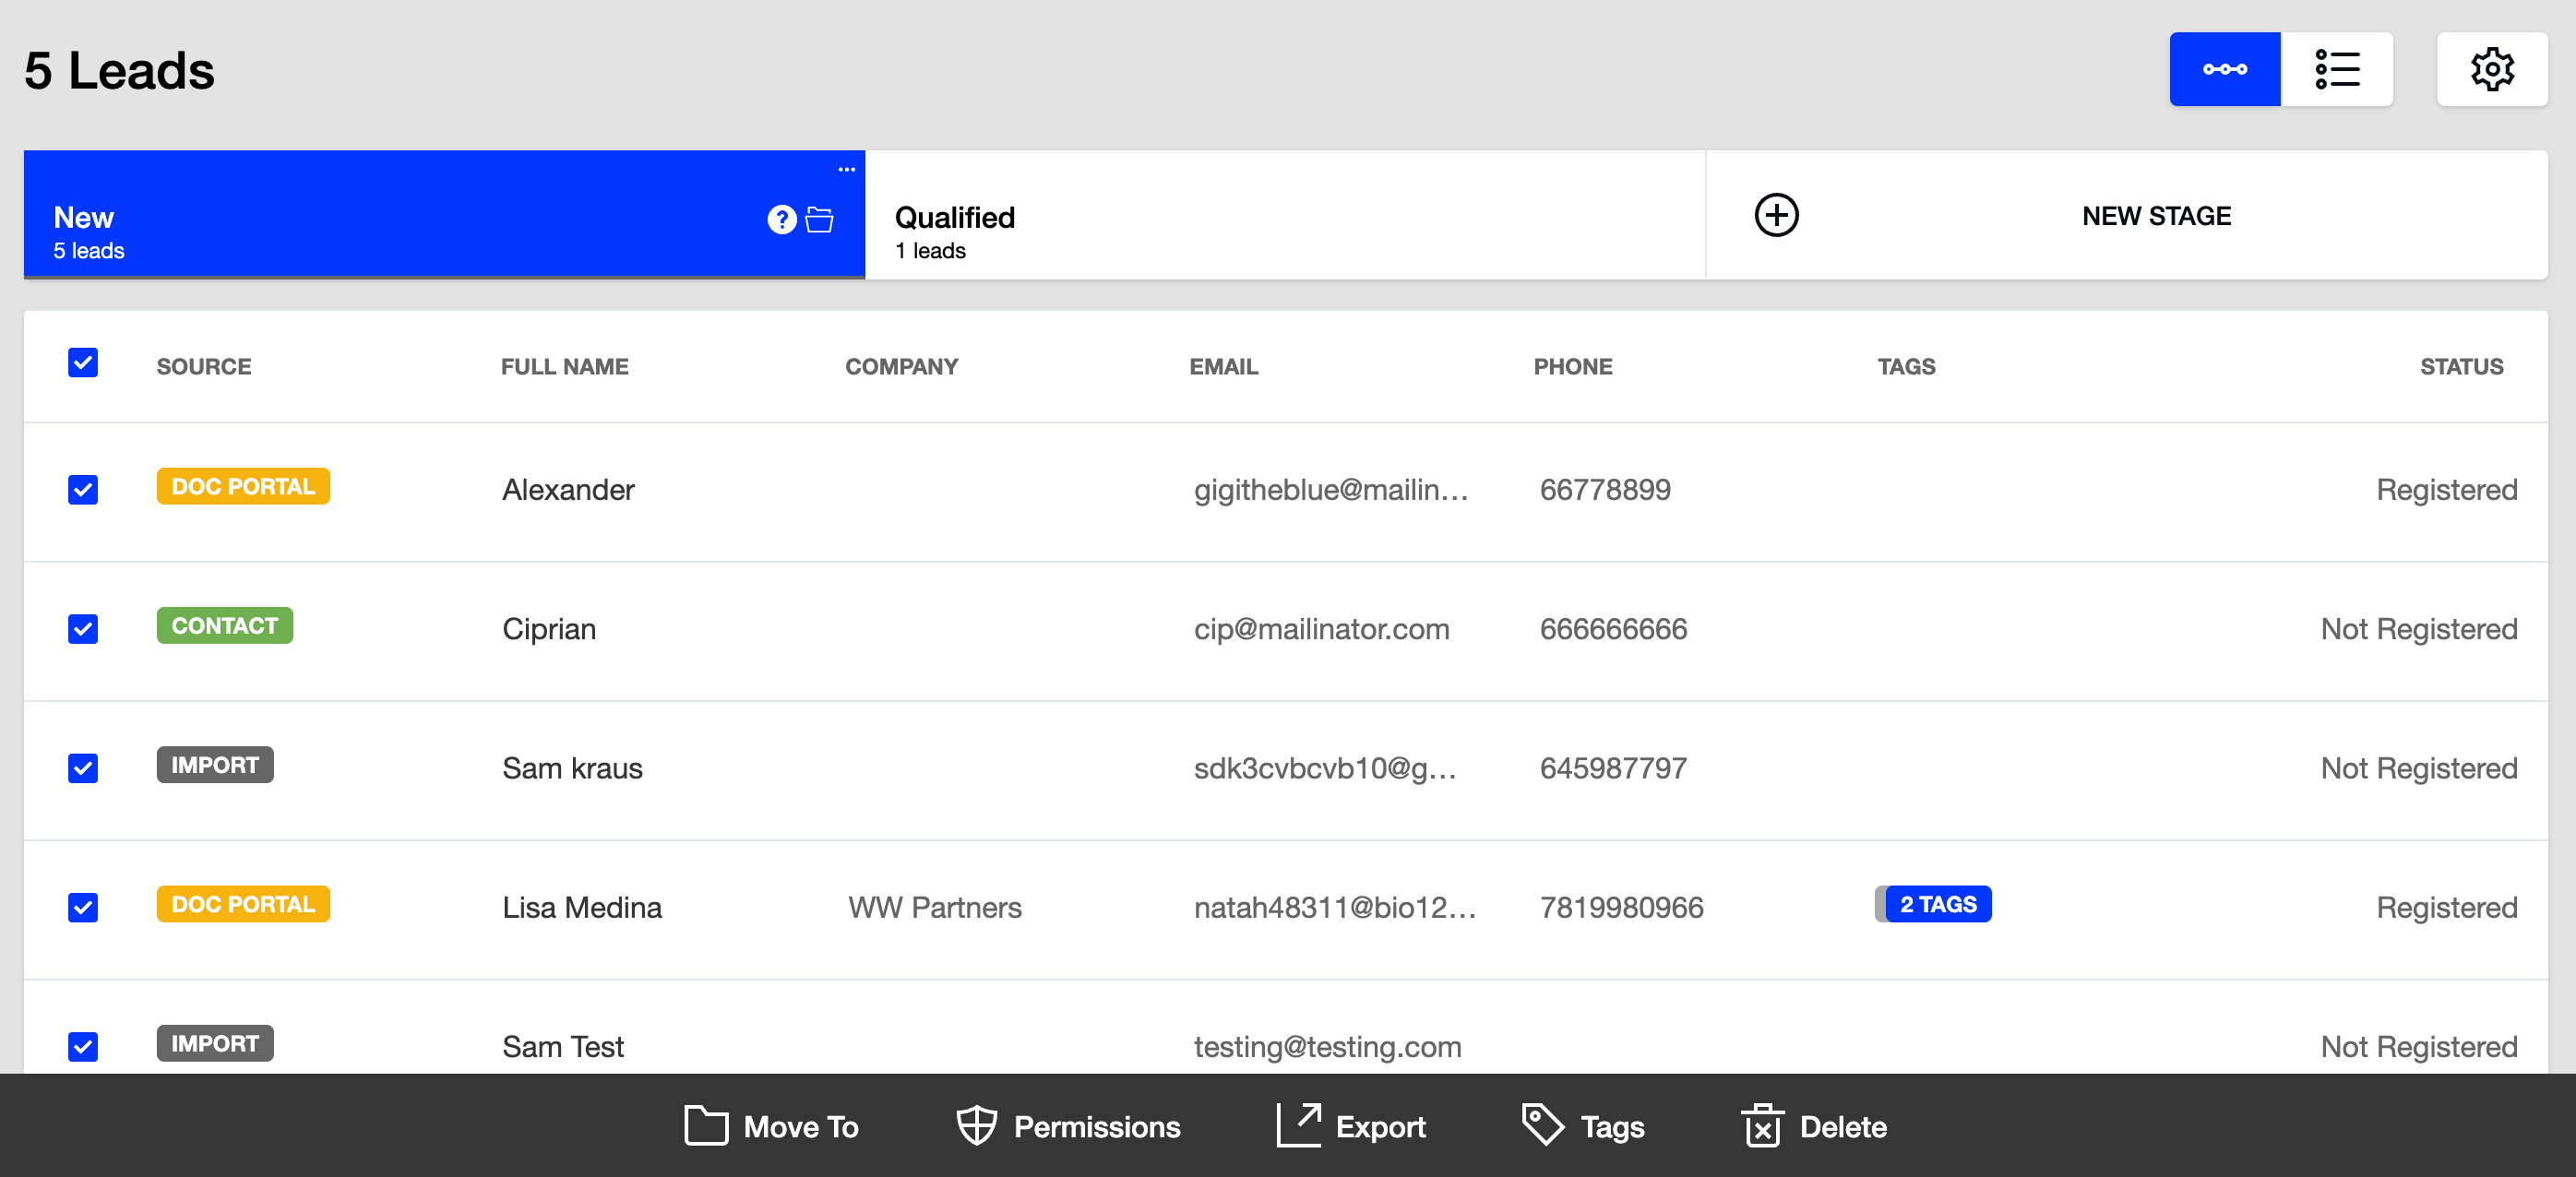
- To move leads to segments:
- click on the checkbox on any leads you want to move to a segment, then click on “Move to” button at the bottom of the screen
- drag and drop a lead from one segment to another

- To reorder segments: simply drag and drop the boxes to reorder if needed
