
Interactive Maps in SharpLaunch allow users to visually define, organize, and customize retailers and locations directly on a map. These tools help present surrounding retail environments clearly and consistently across property websites and marketing materials such as flyers.
This article explains the core capabilities of Interactive Maps and how they can be used to create clear, informative property visuals.
Core Capabilities
1. Map Drawing & Editing Tools
The map editor includes a toolbar with tools for creating and managing visual elements:
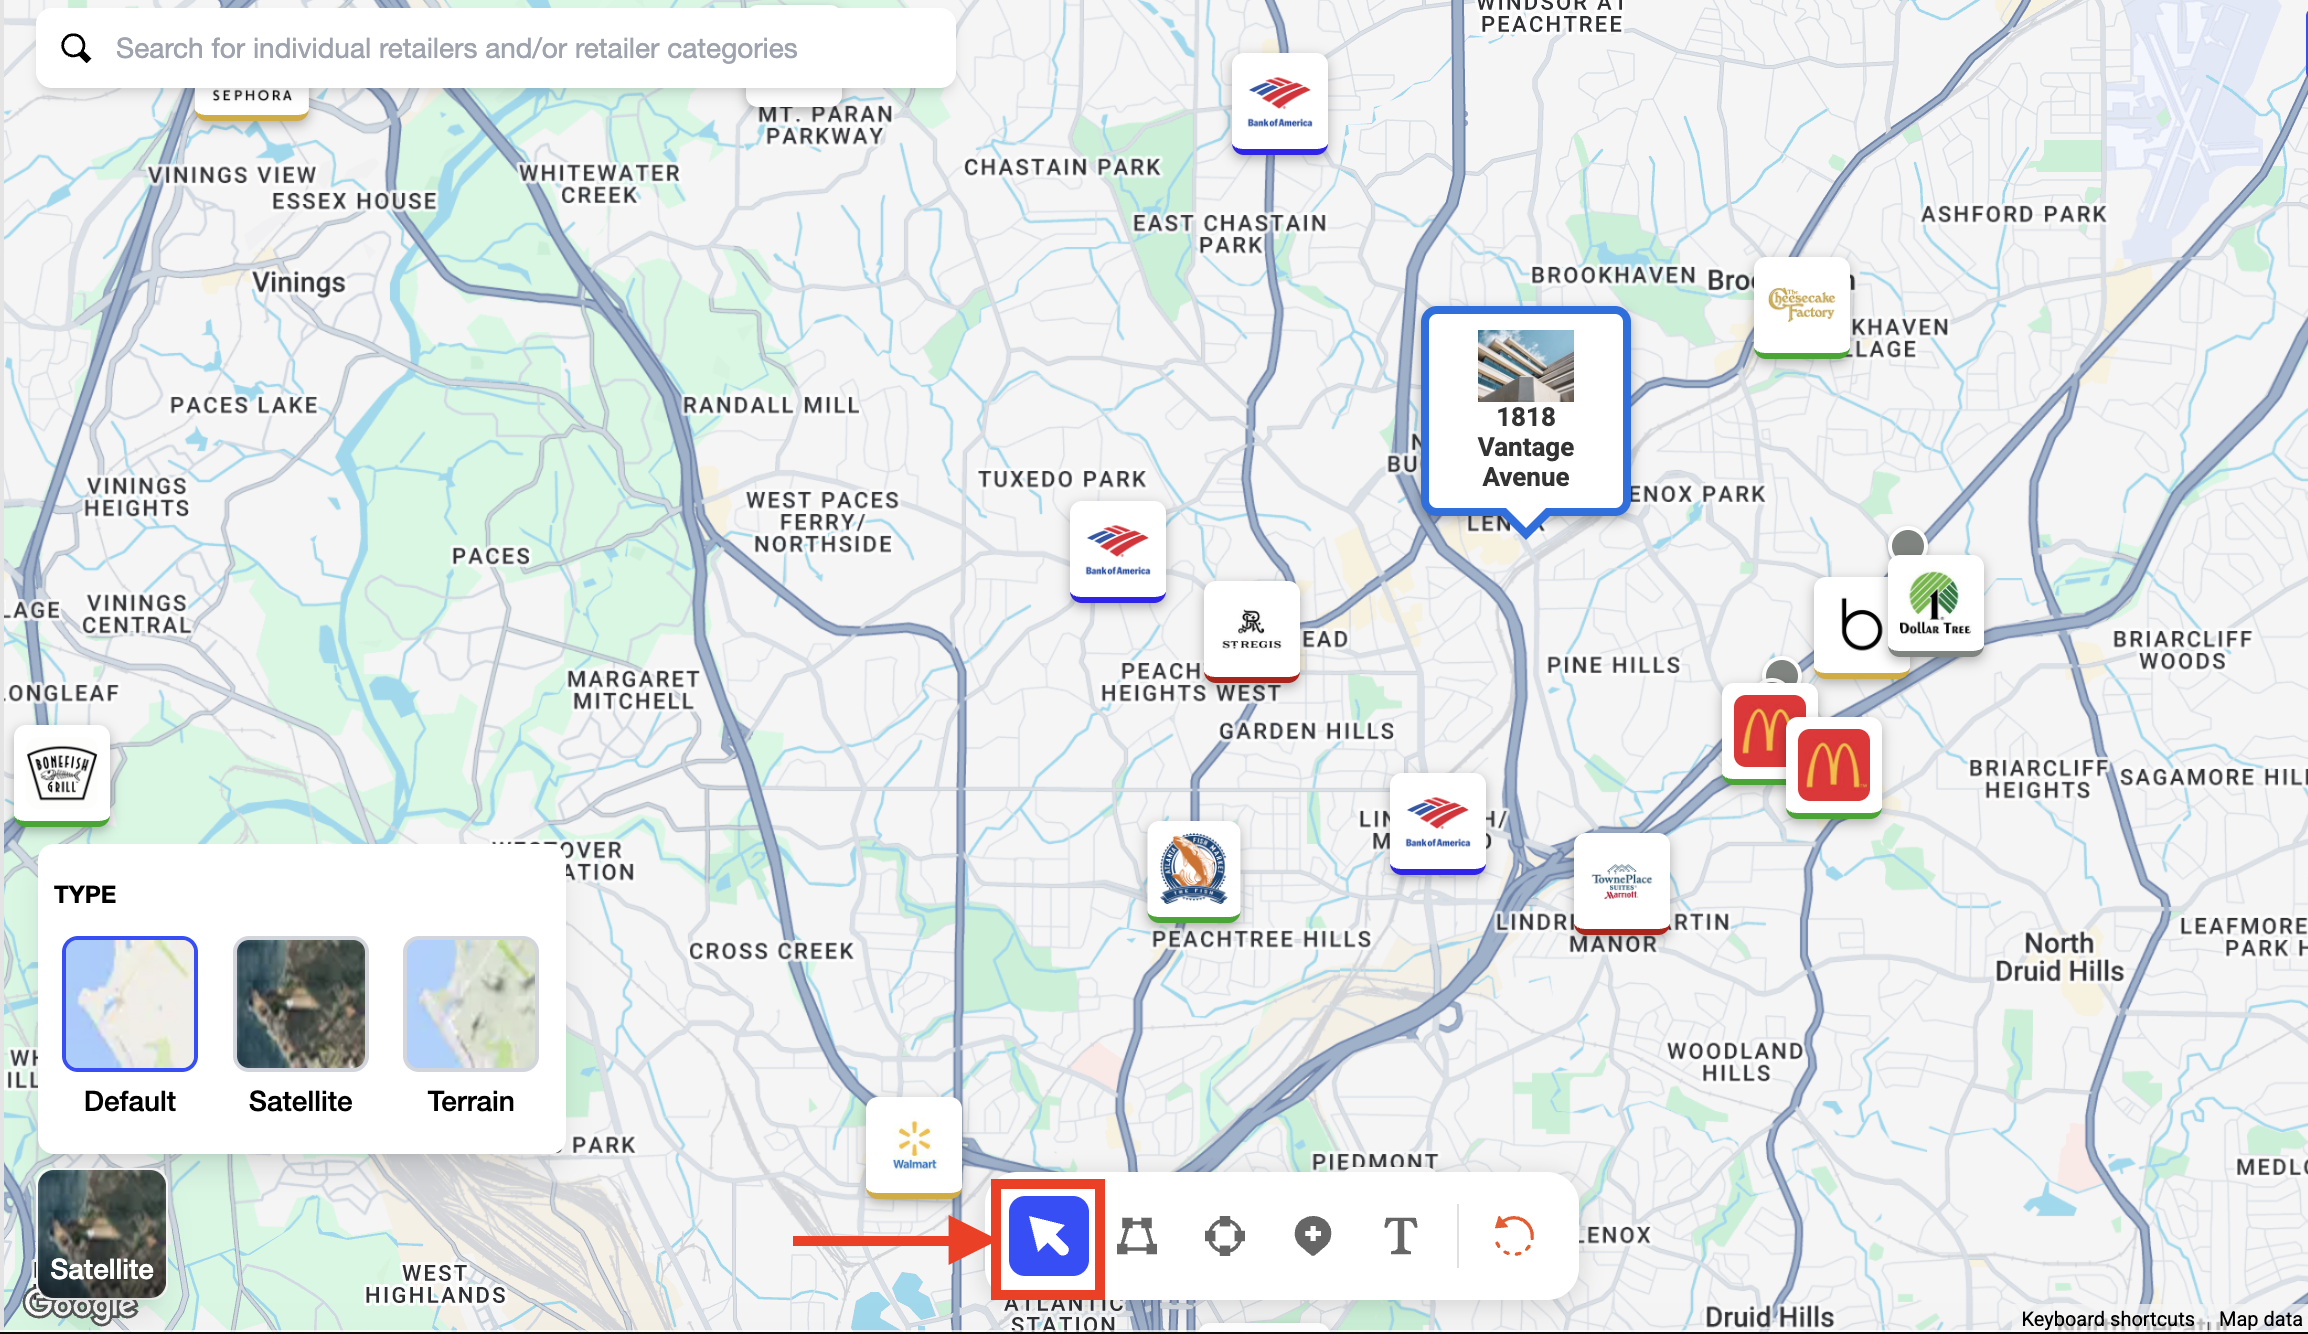
Select
- Select any marker, group, or drawing on the map
- Edit details, reposition elements, or update styling
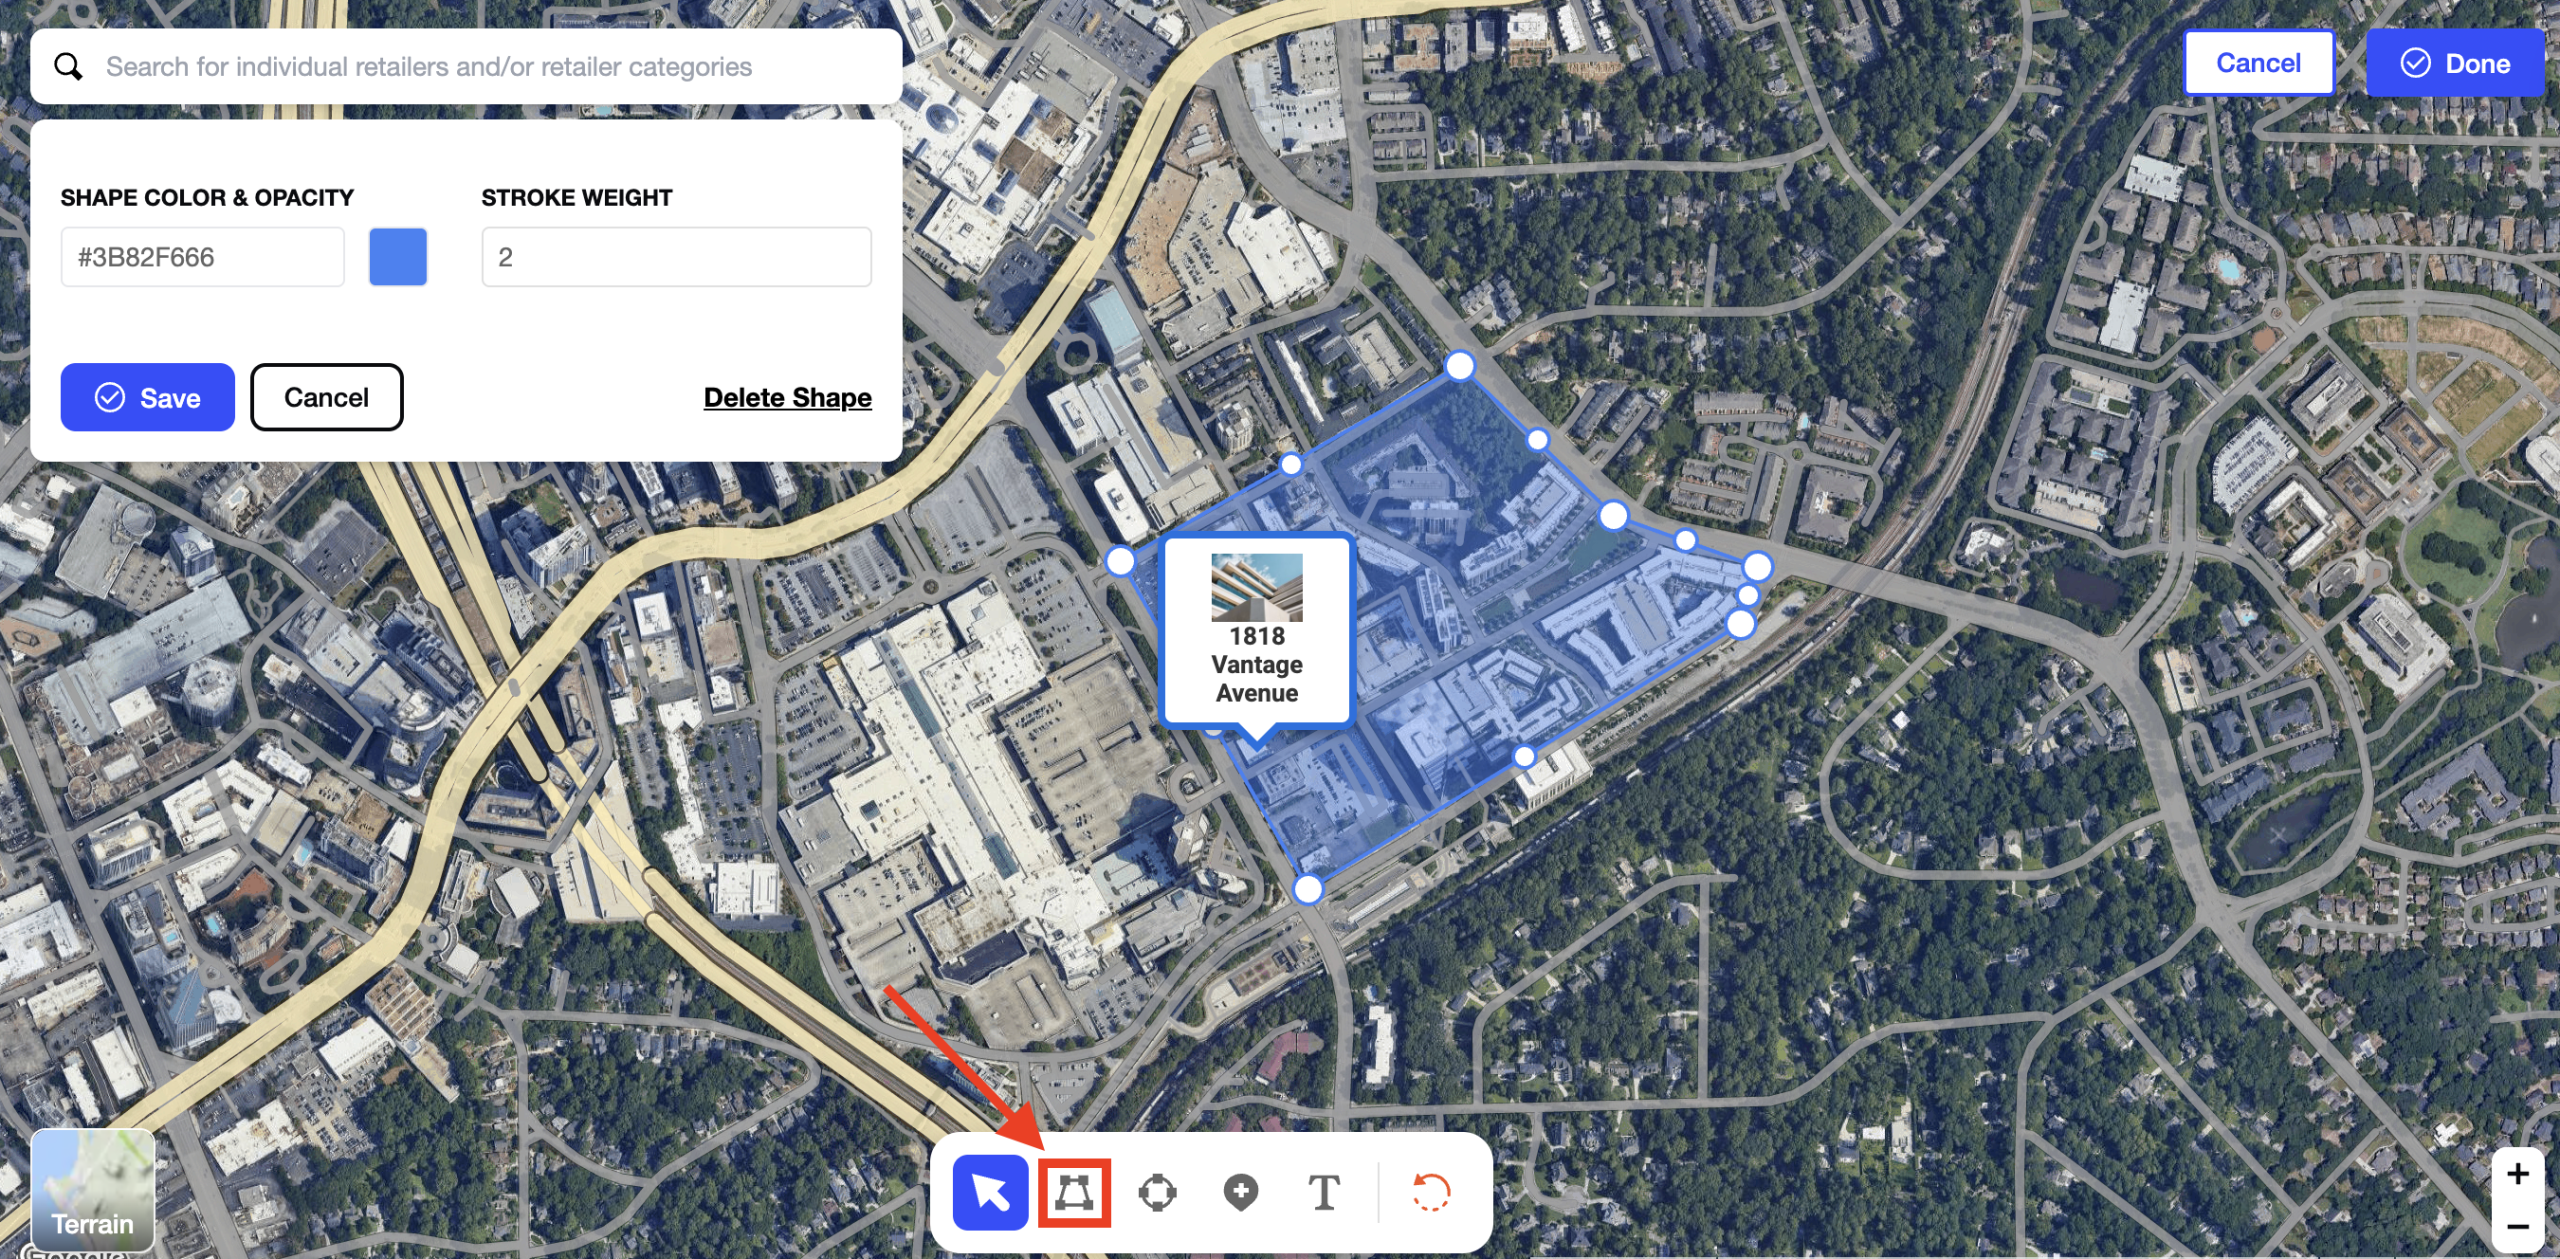
Polygon
- Draw custom polygon areas made up of individual points
- Close the polygon by double-clicking the last point
- Useful for outlining districts, retail corridors, or custom zones
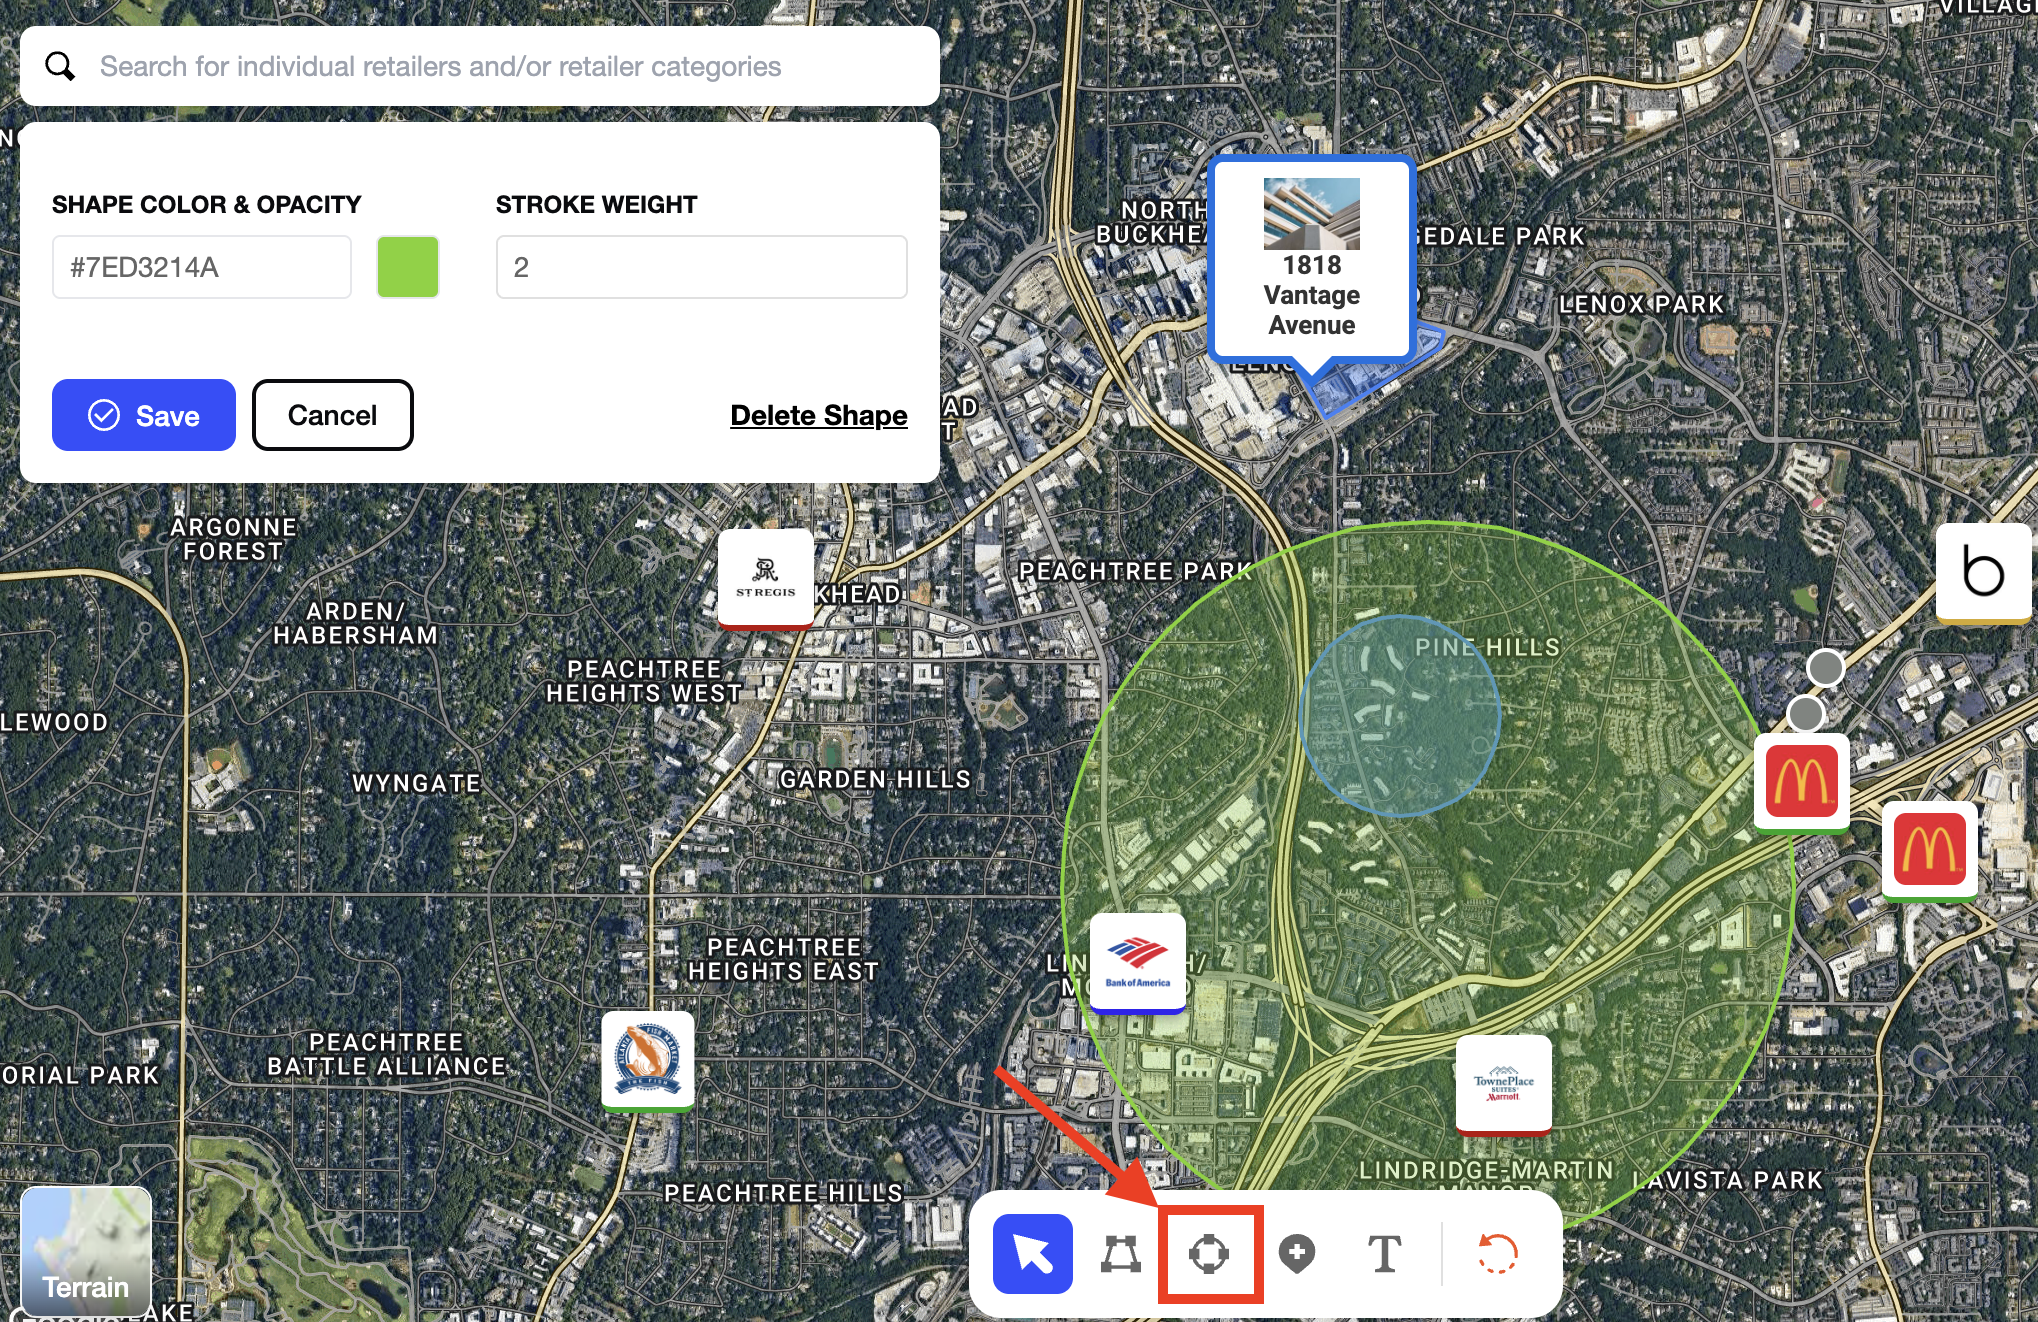
Circle
- Create circular areas by clicking a point and dragging the mouse
- Commonly used for defining radius-based areas around a property
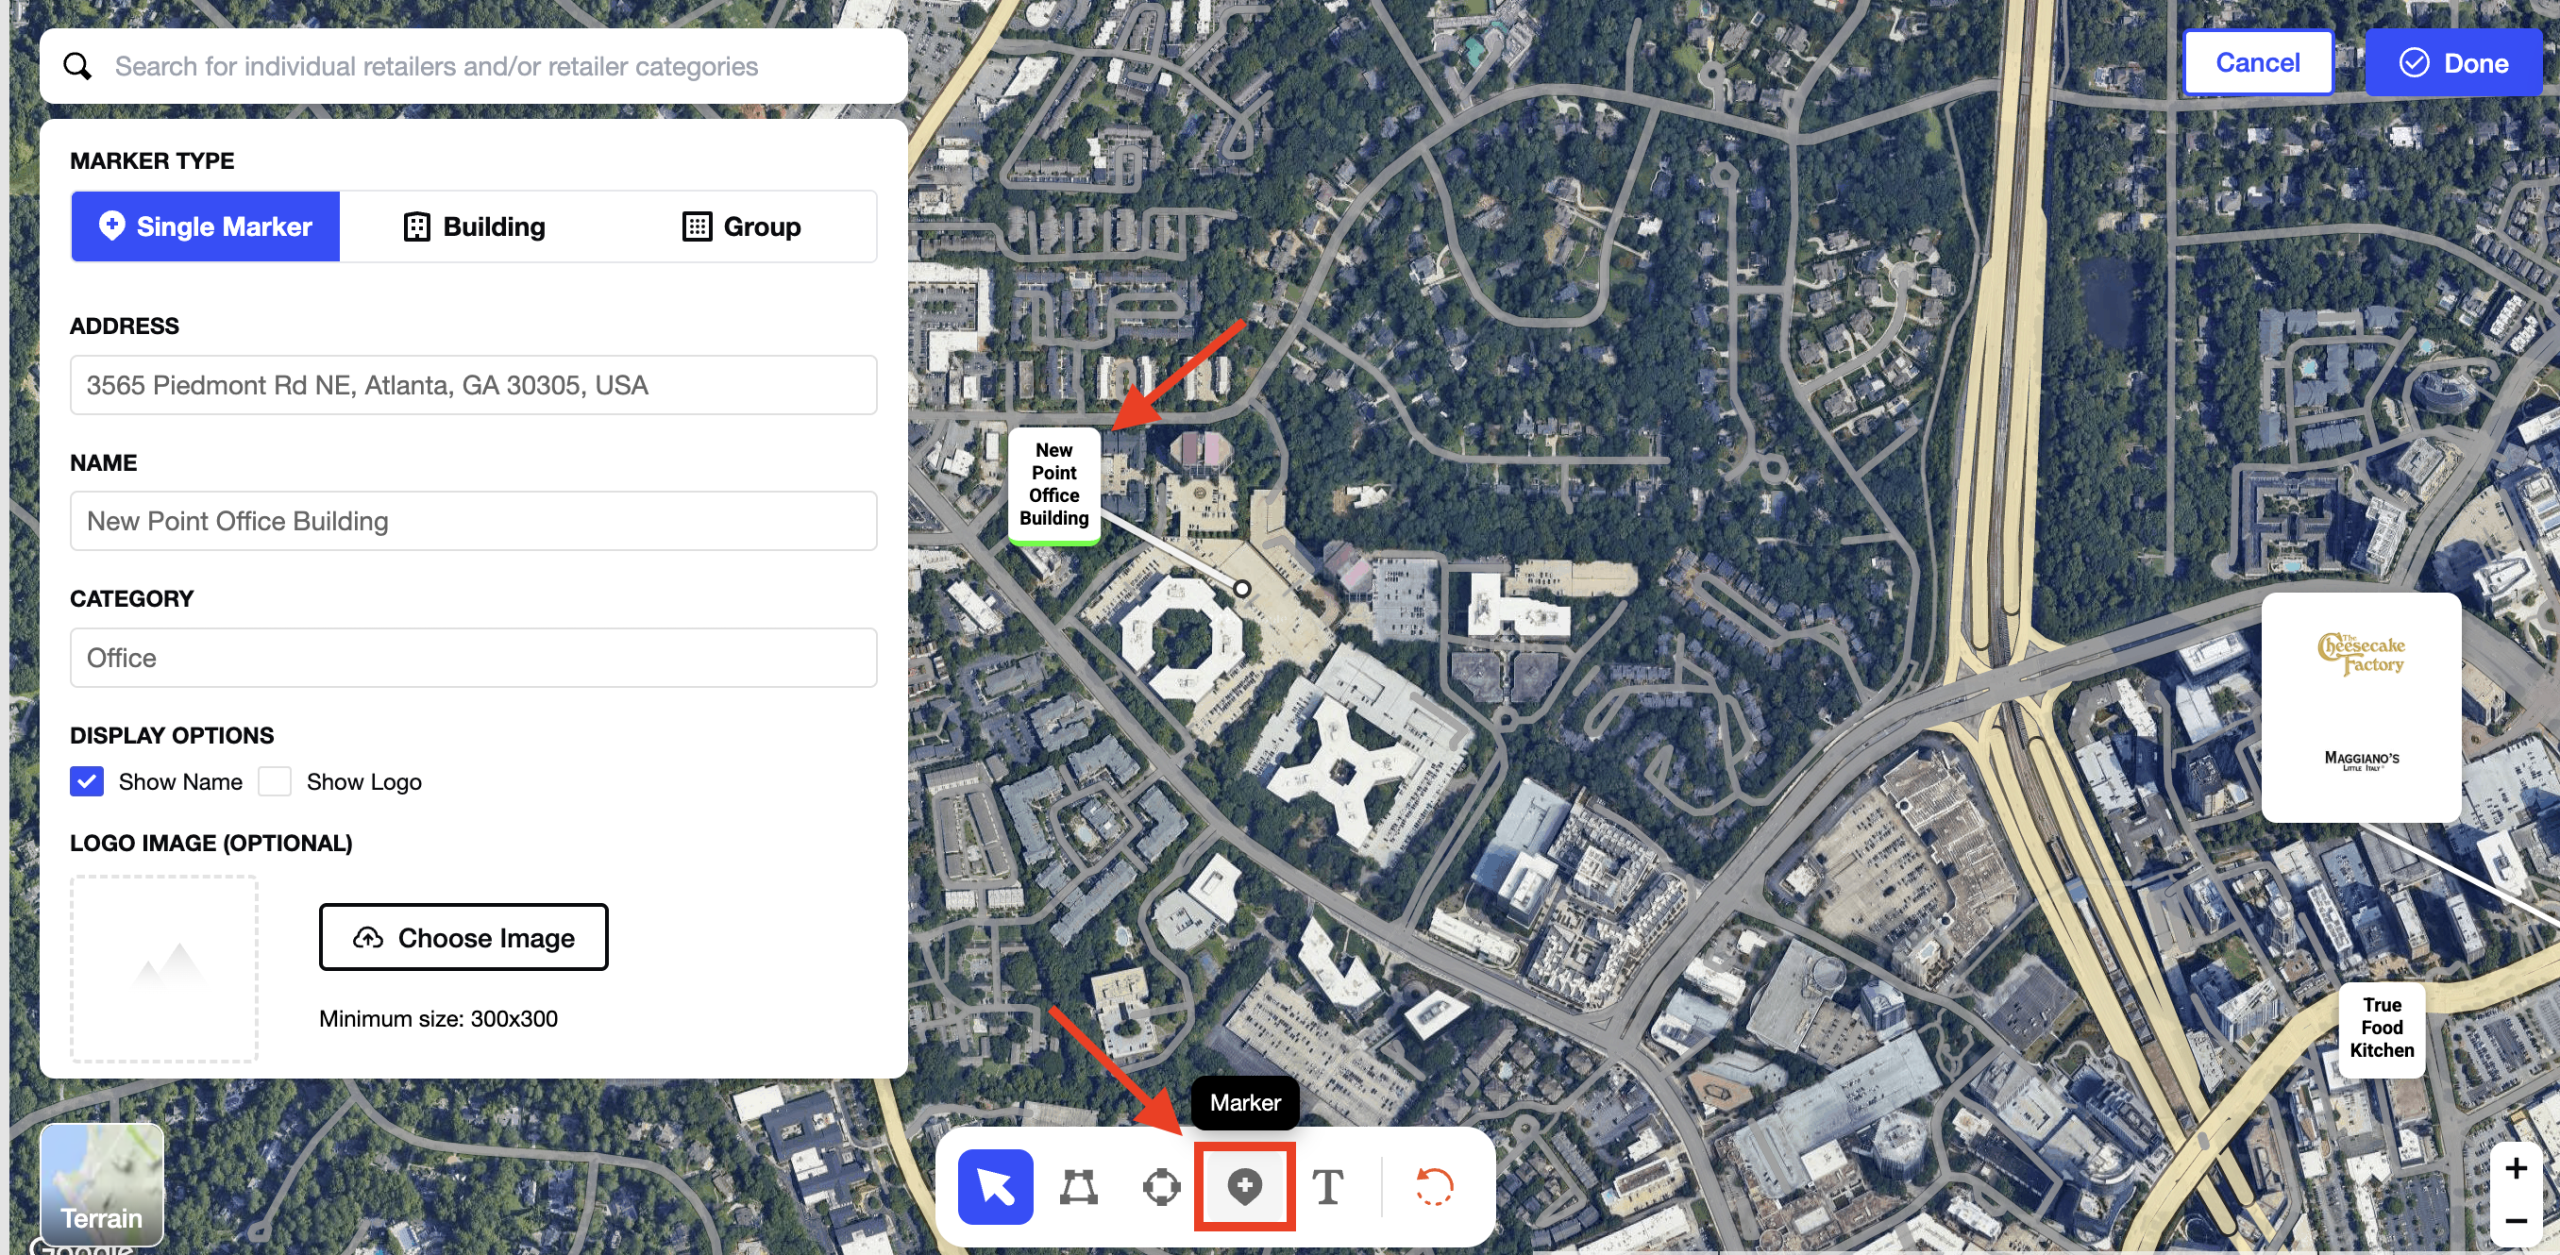
Marker
- Add markers to represent:
- Individual retailers
- Buildings
- Retailer groups
- Each marker automatically captures the address of the selected map location
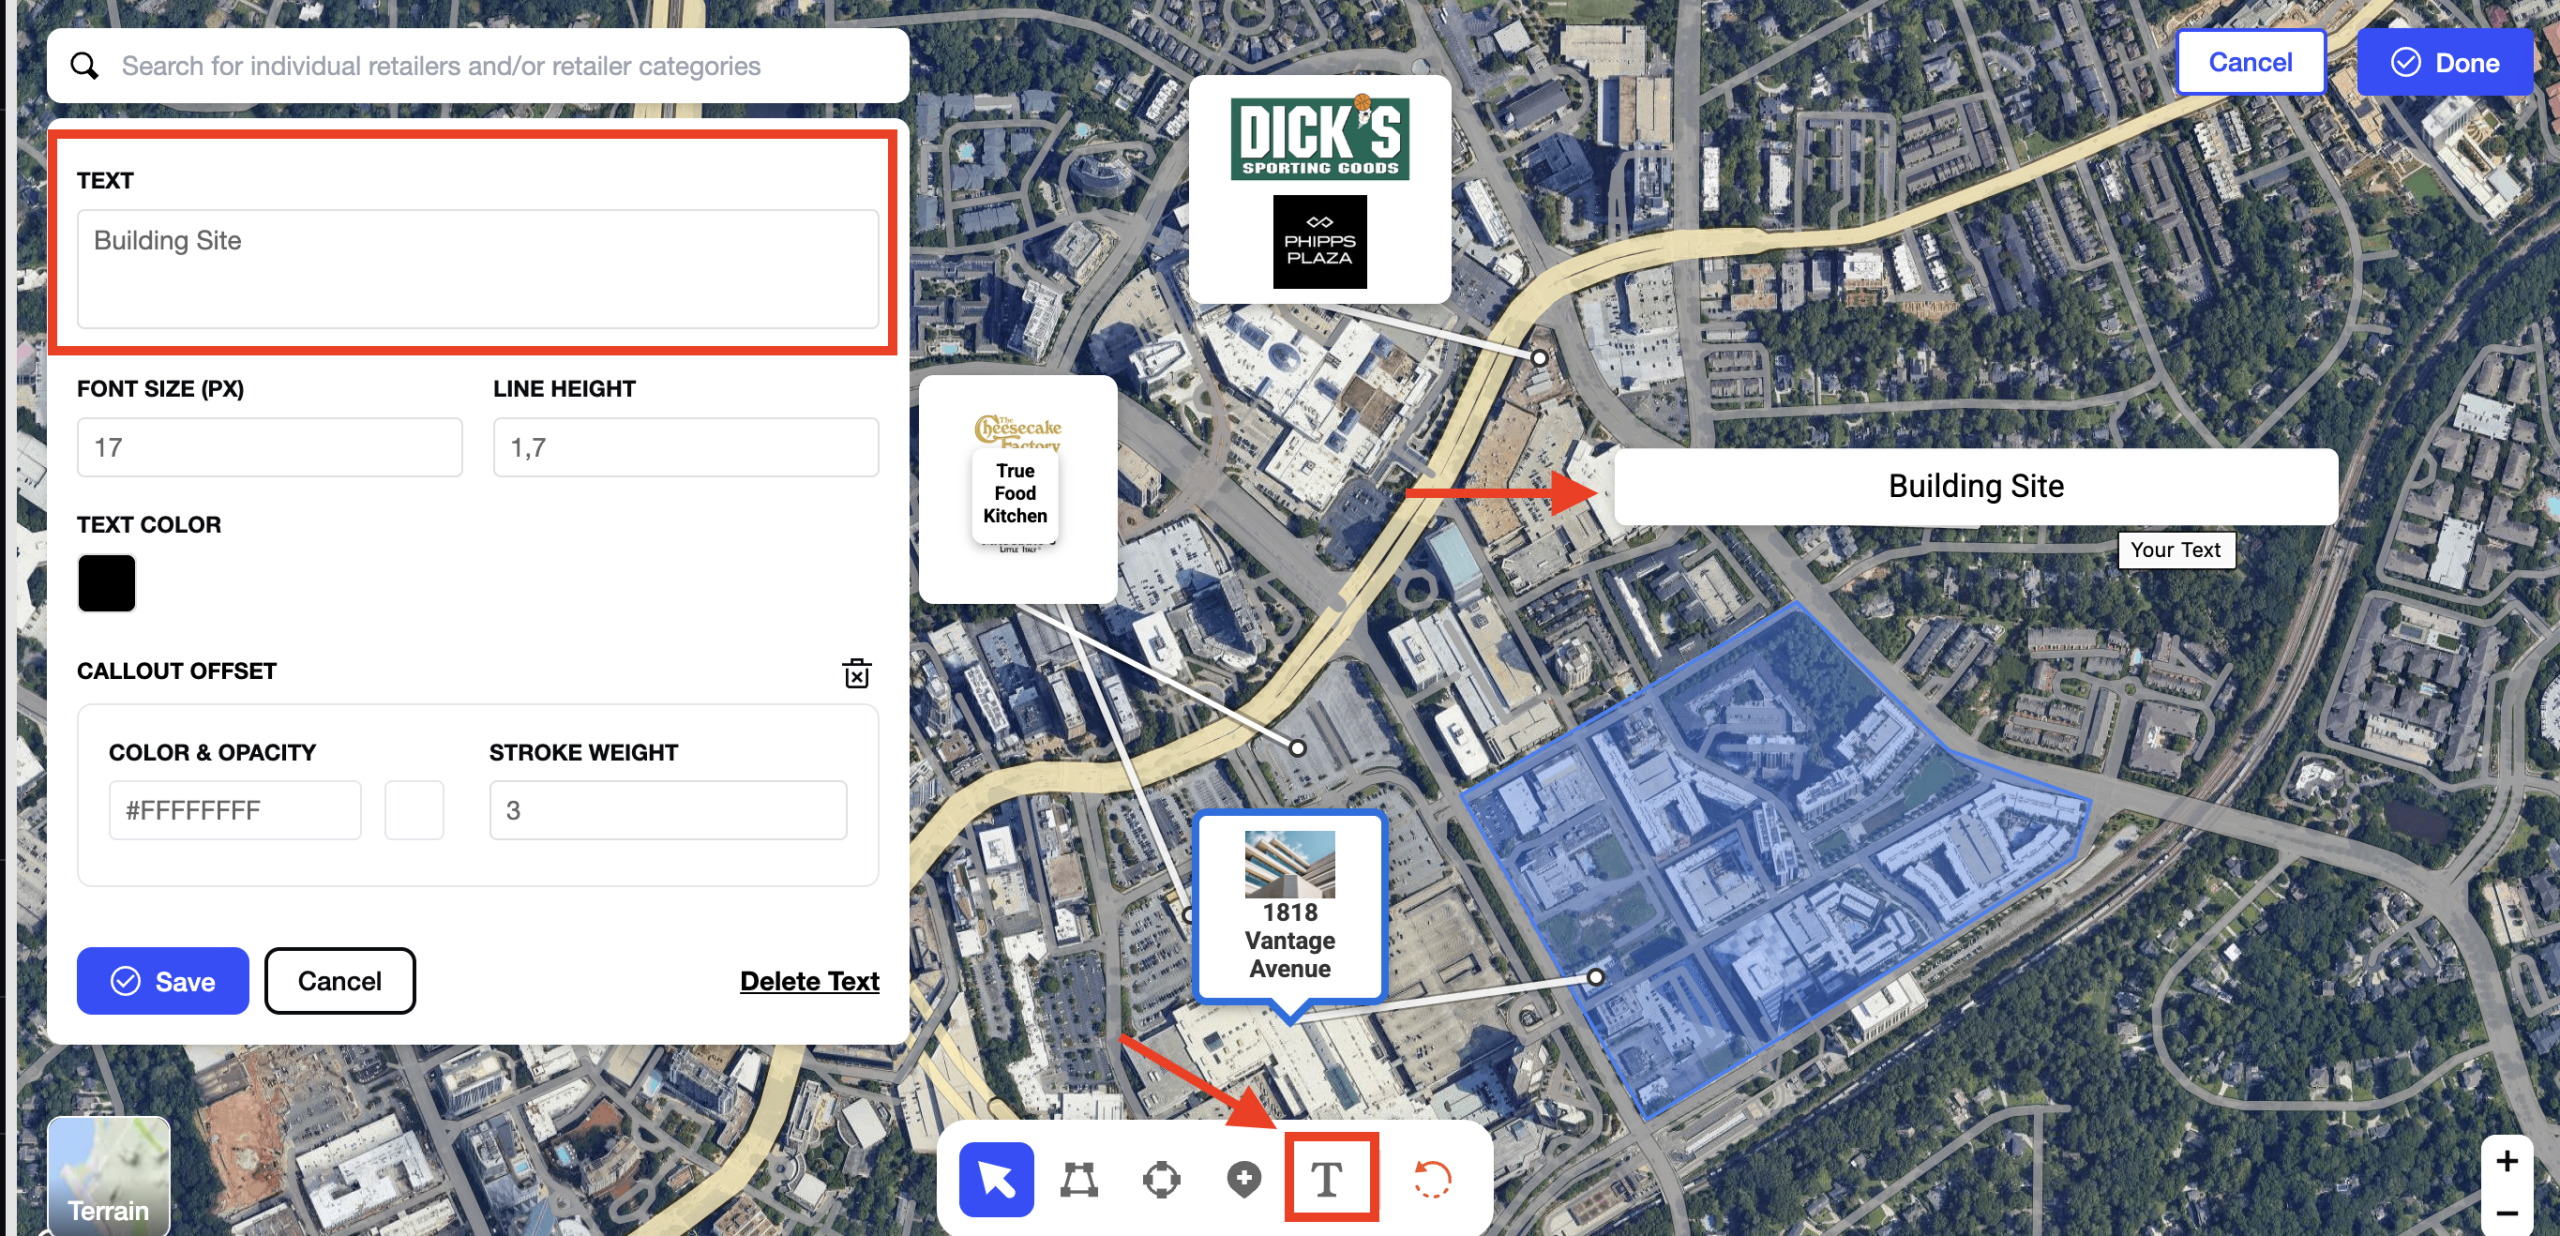
Text Tool
- Add free-form text directly to the map
- Text appears with a white background and default placeholder text
- Content can be edited from the sidebar
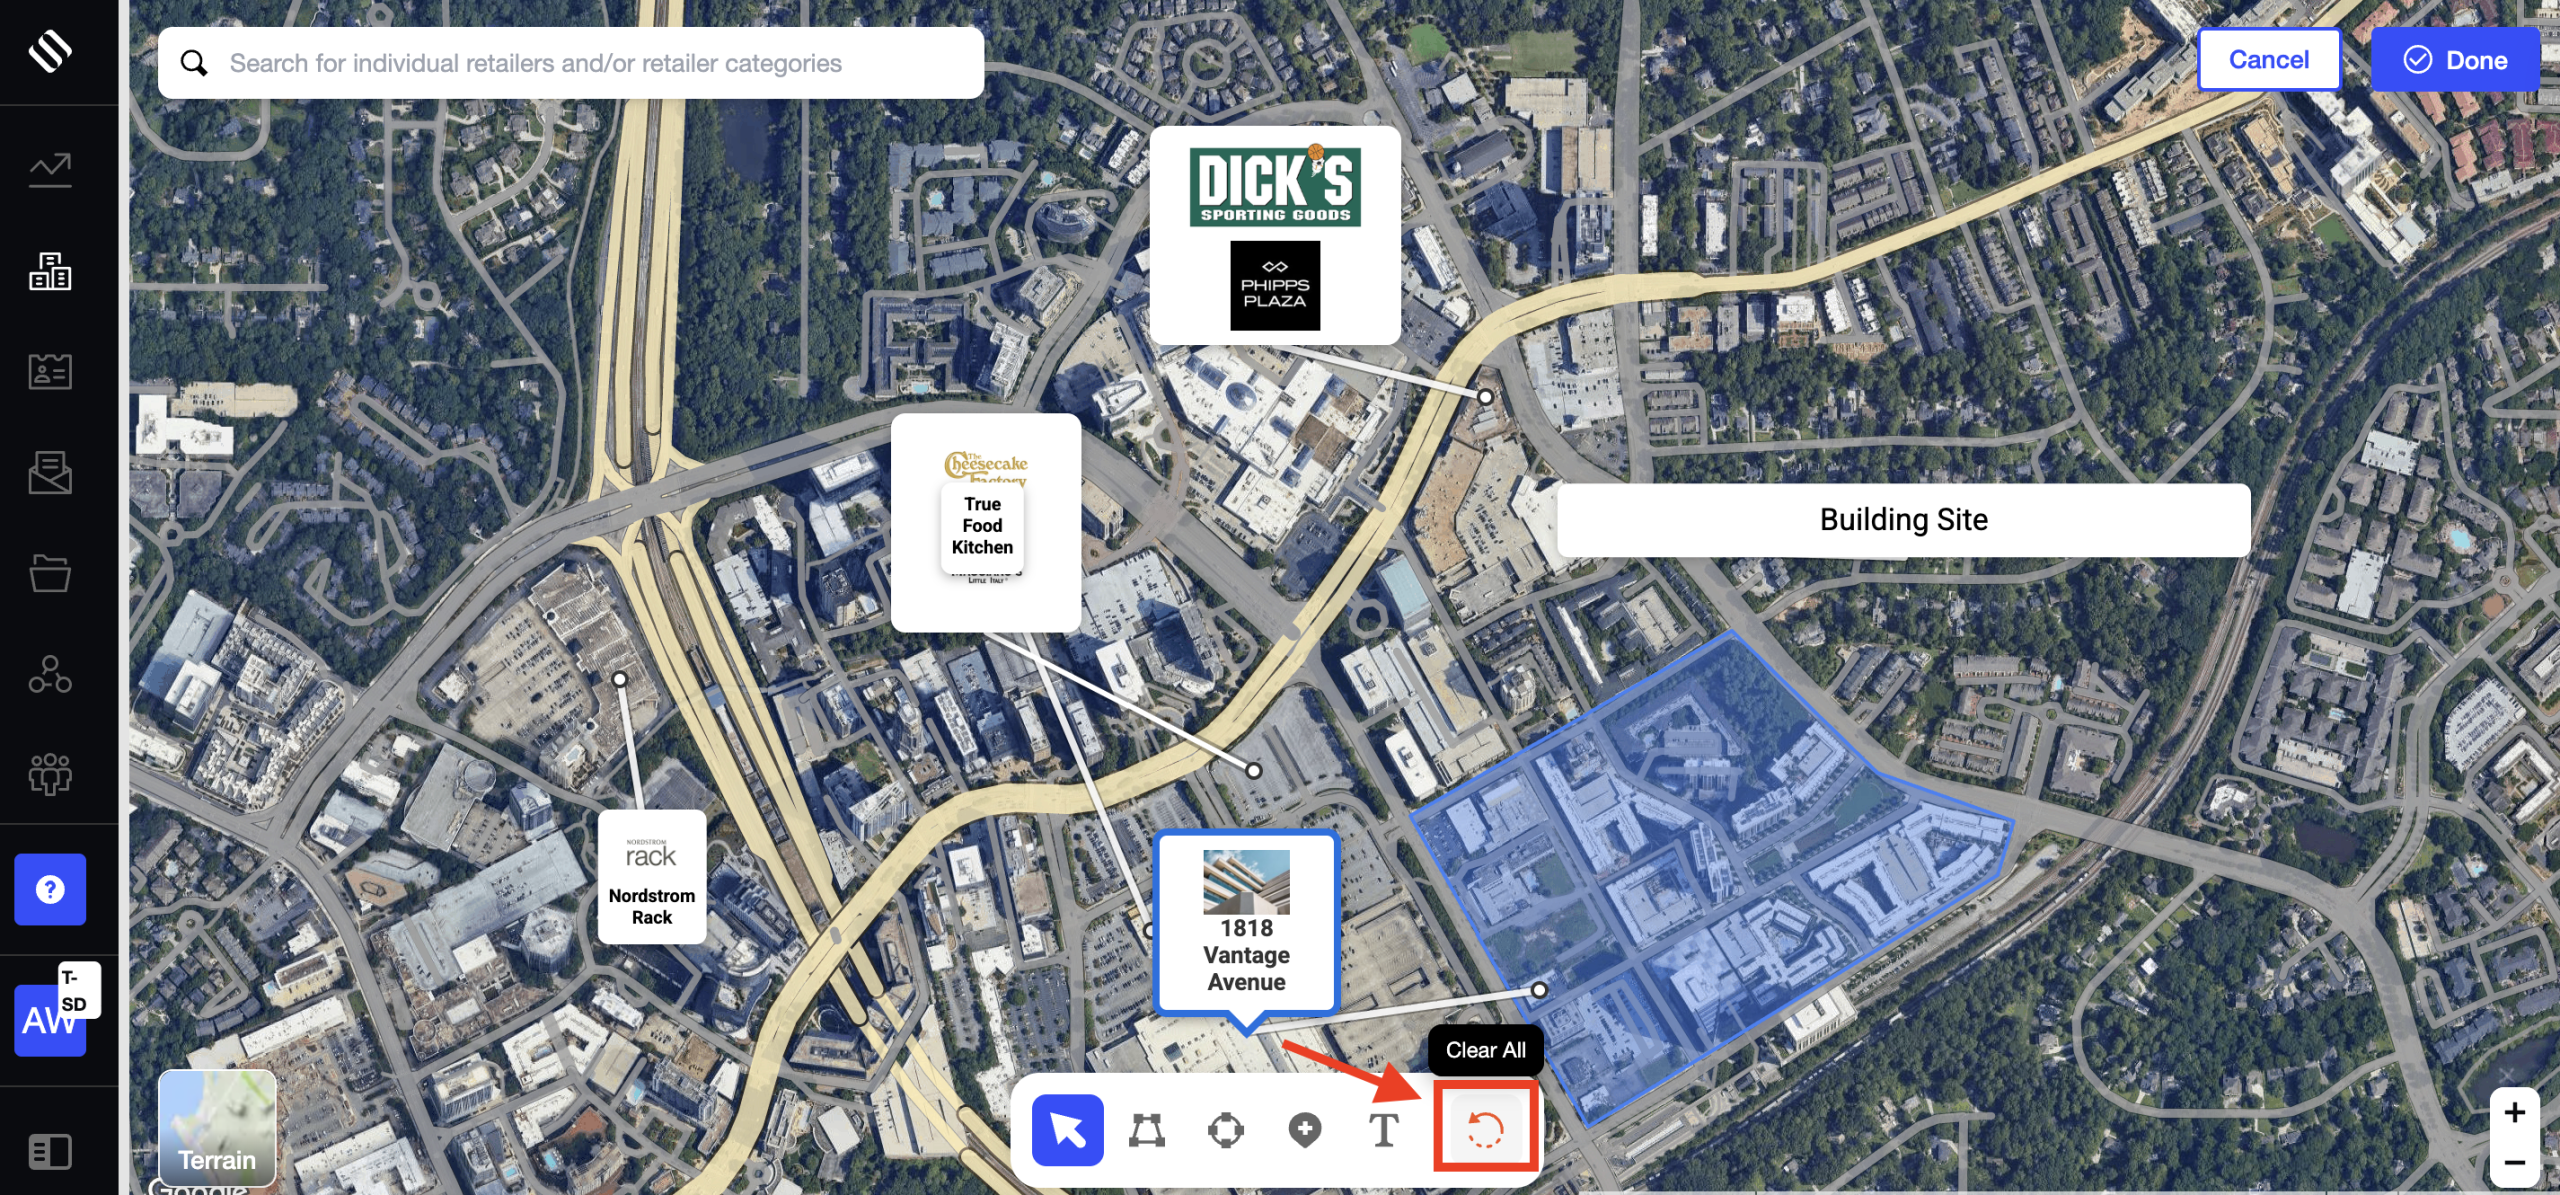
Clear All
- Removes all user-created markers and drawings from the map
- Building property markers remain intact
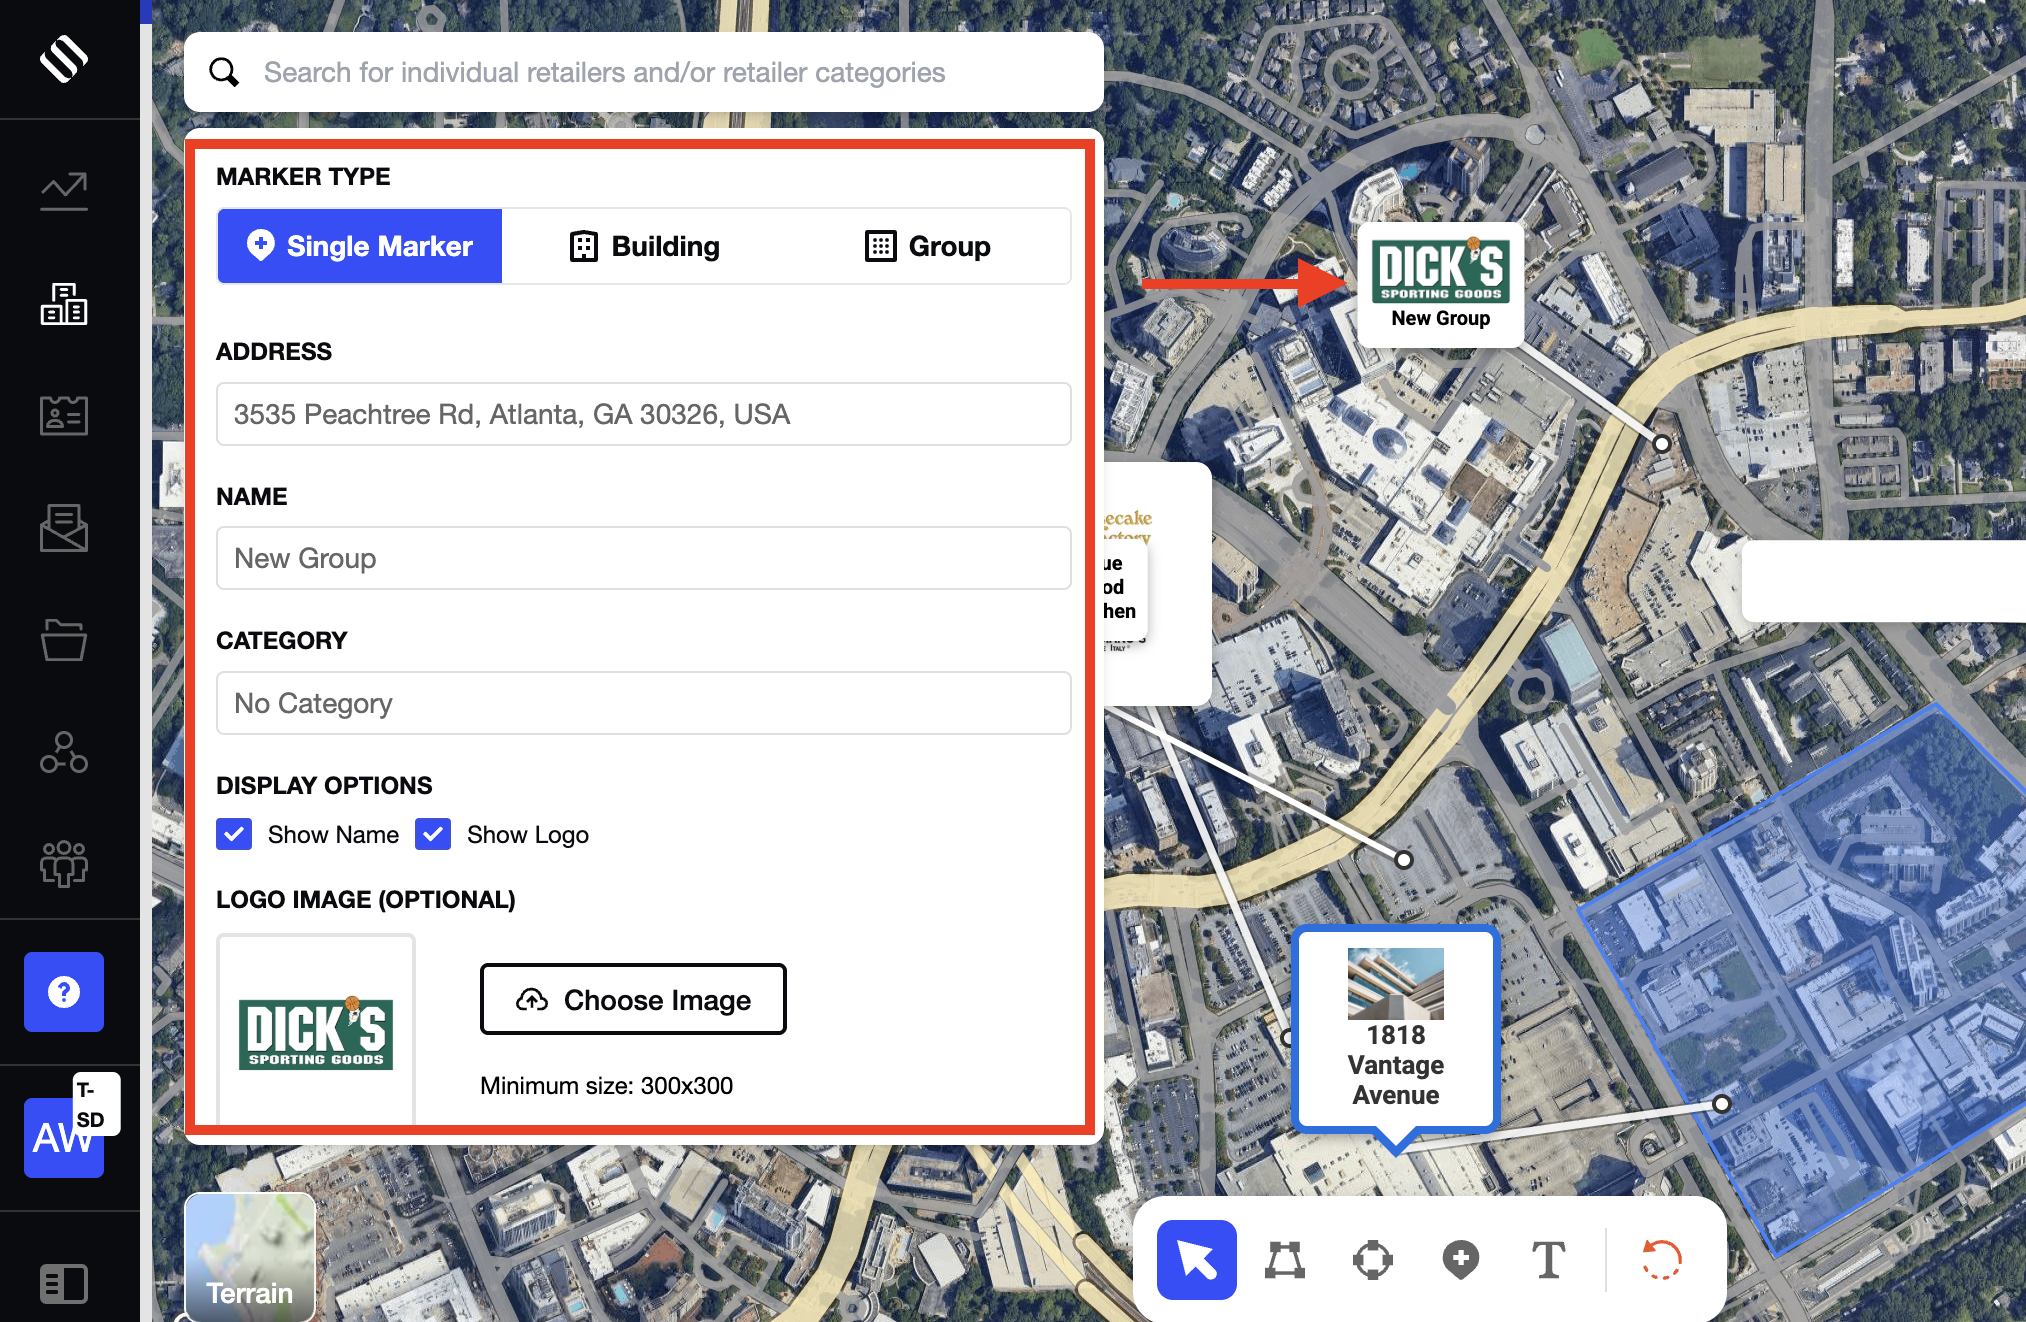
2. Marker & Retailer Display Controls
Markers can be customized to control how retailers and buildings appear:
- Edit the address
- Add a retailer or building name
- Assign a category (single markers only)
- Upload a retailer logo
- Toggle visibility options for name and logo
Display behavior:
- No name or logo selected → marker appears as a dot
- Name selected → retailer name is displayed
- Name and logo selected → both appear (when a logo is available)
- Logo selected only → logo is displayed without text
These options allow maps to remain clean while highlighting key locations.
3. Create Retailer Groups Using Nearby Places
Interactive Maps can suggest nearby retailers based on distance from the property:
- Suggestions appear in the left sidebar when the map is opened
- The distance radius is 3 miles from the subject property
- Adjusting the distance updates the list of suggested retailers
The distance is calculated from the building address associated with the property.

Users can:
- Select multiple nearby places
- Add them directly to the map
- Assign or adjust categories after adding, if needed
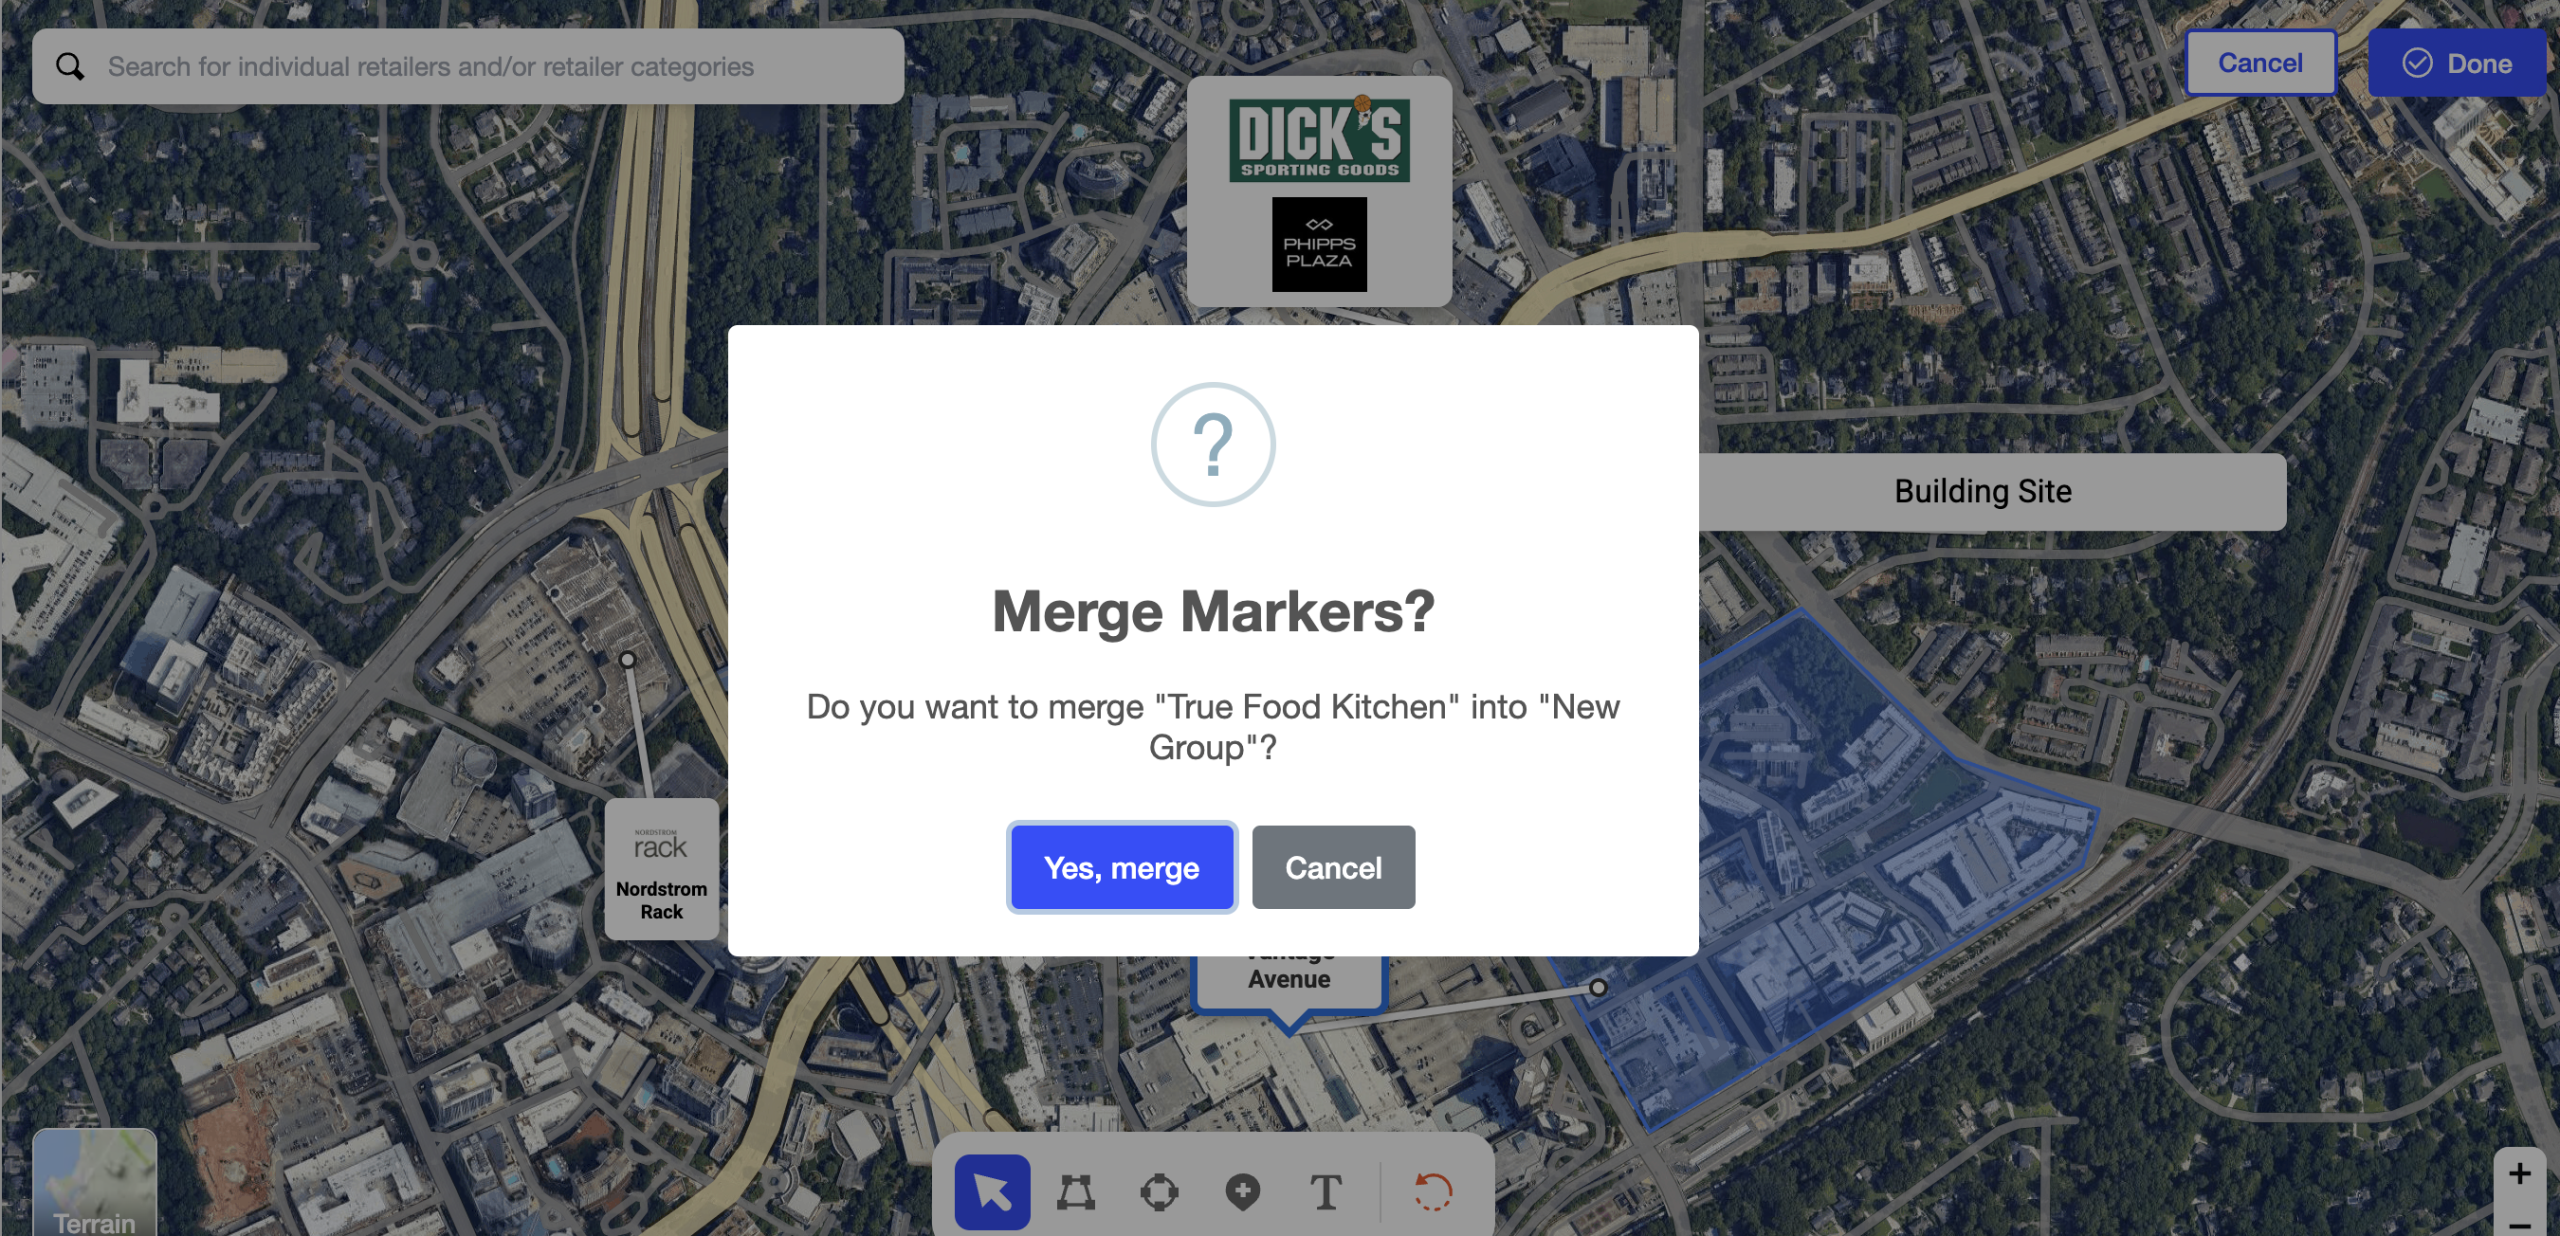
4. Group Retailers Visually
Retailers can be grouped in two ways:
Drag and Drop
- Drag one retailer marker or logo on top of another to merge them into a group
Manual Group Creation
- Select the Marker tool
- Choose the Group option
- Enter a group name and upload a logo
Groups help simplify dense retail areas and make maps easier to interpret.
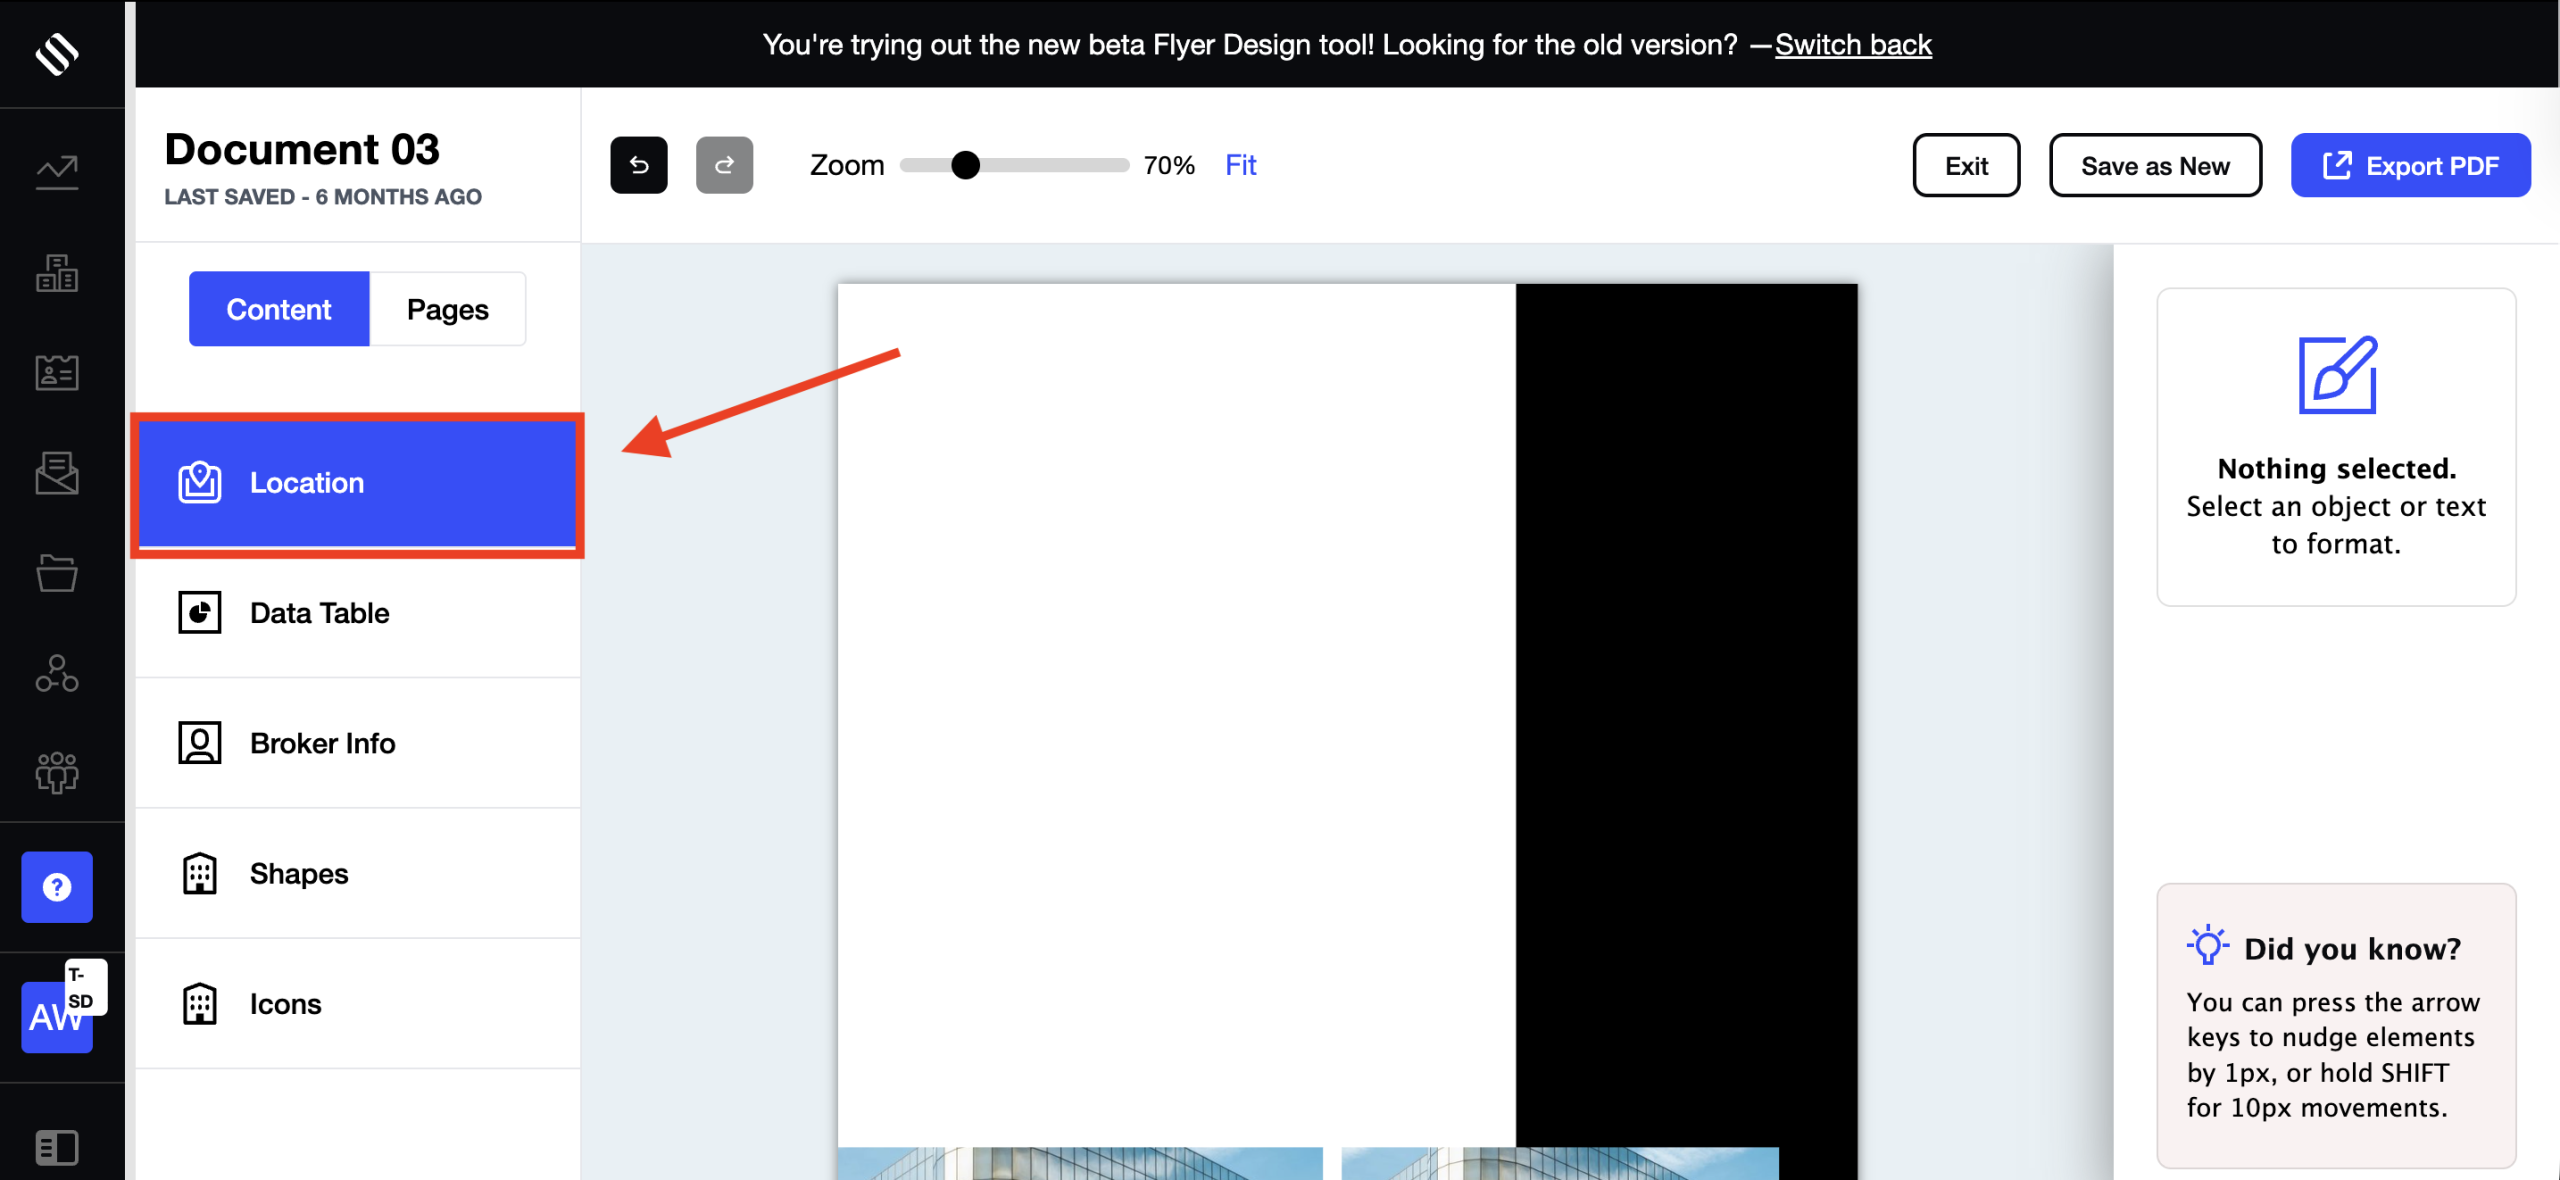
5. Export Maps to Flyers with a Custom Crop Area
Maps can be exported into flyers with precise control over the visible area:
- Open the flyer tool and insert the map from the Location Map section
- The system loads the map created in the editor
To define the export area:
- A blue selection marker appears on the map
- Selecting the marker reveals control points on each corner
- Drag the corner points horizontally or vertically to resize the export area
- The selected area updates in real time
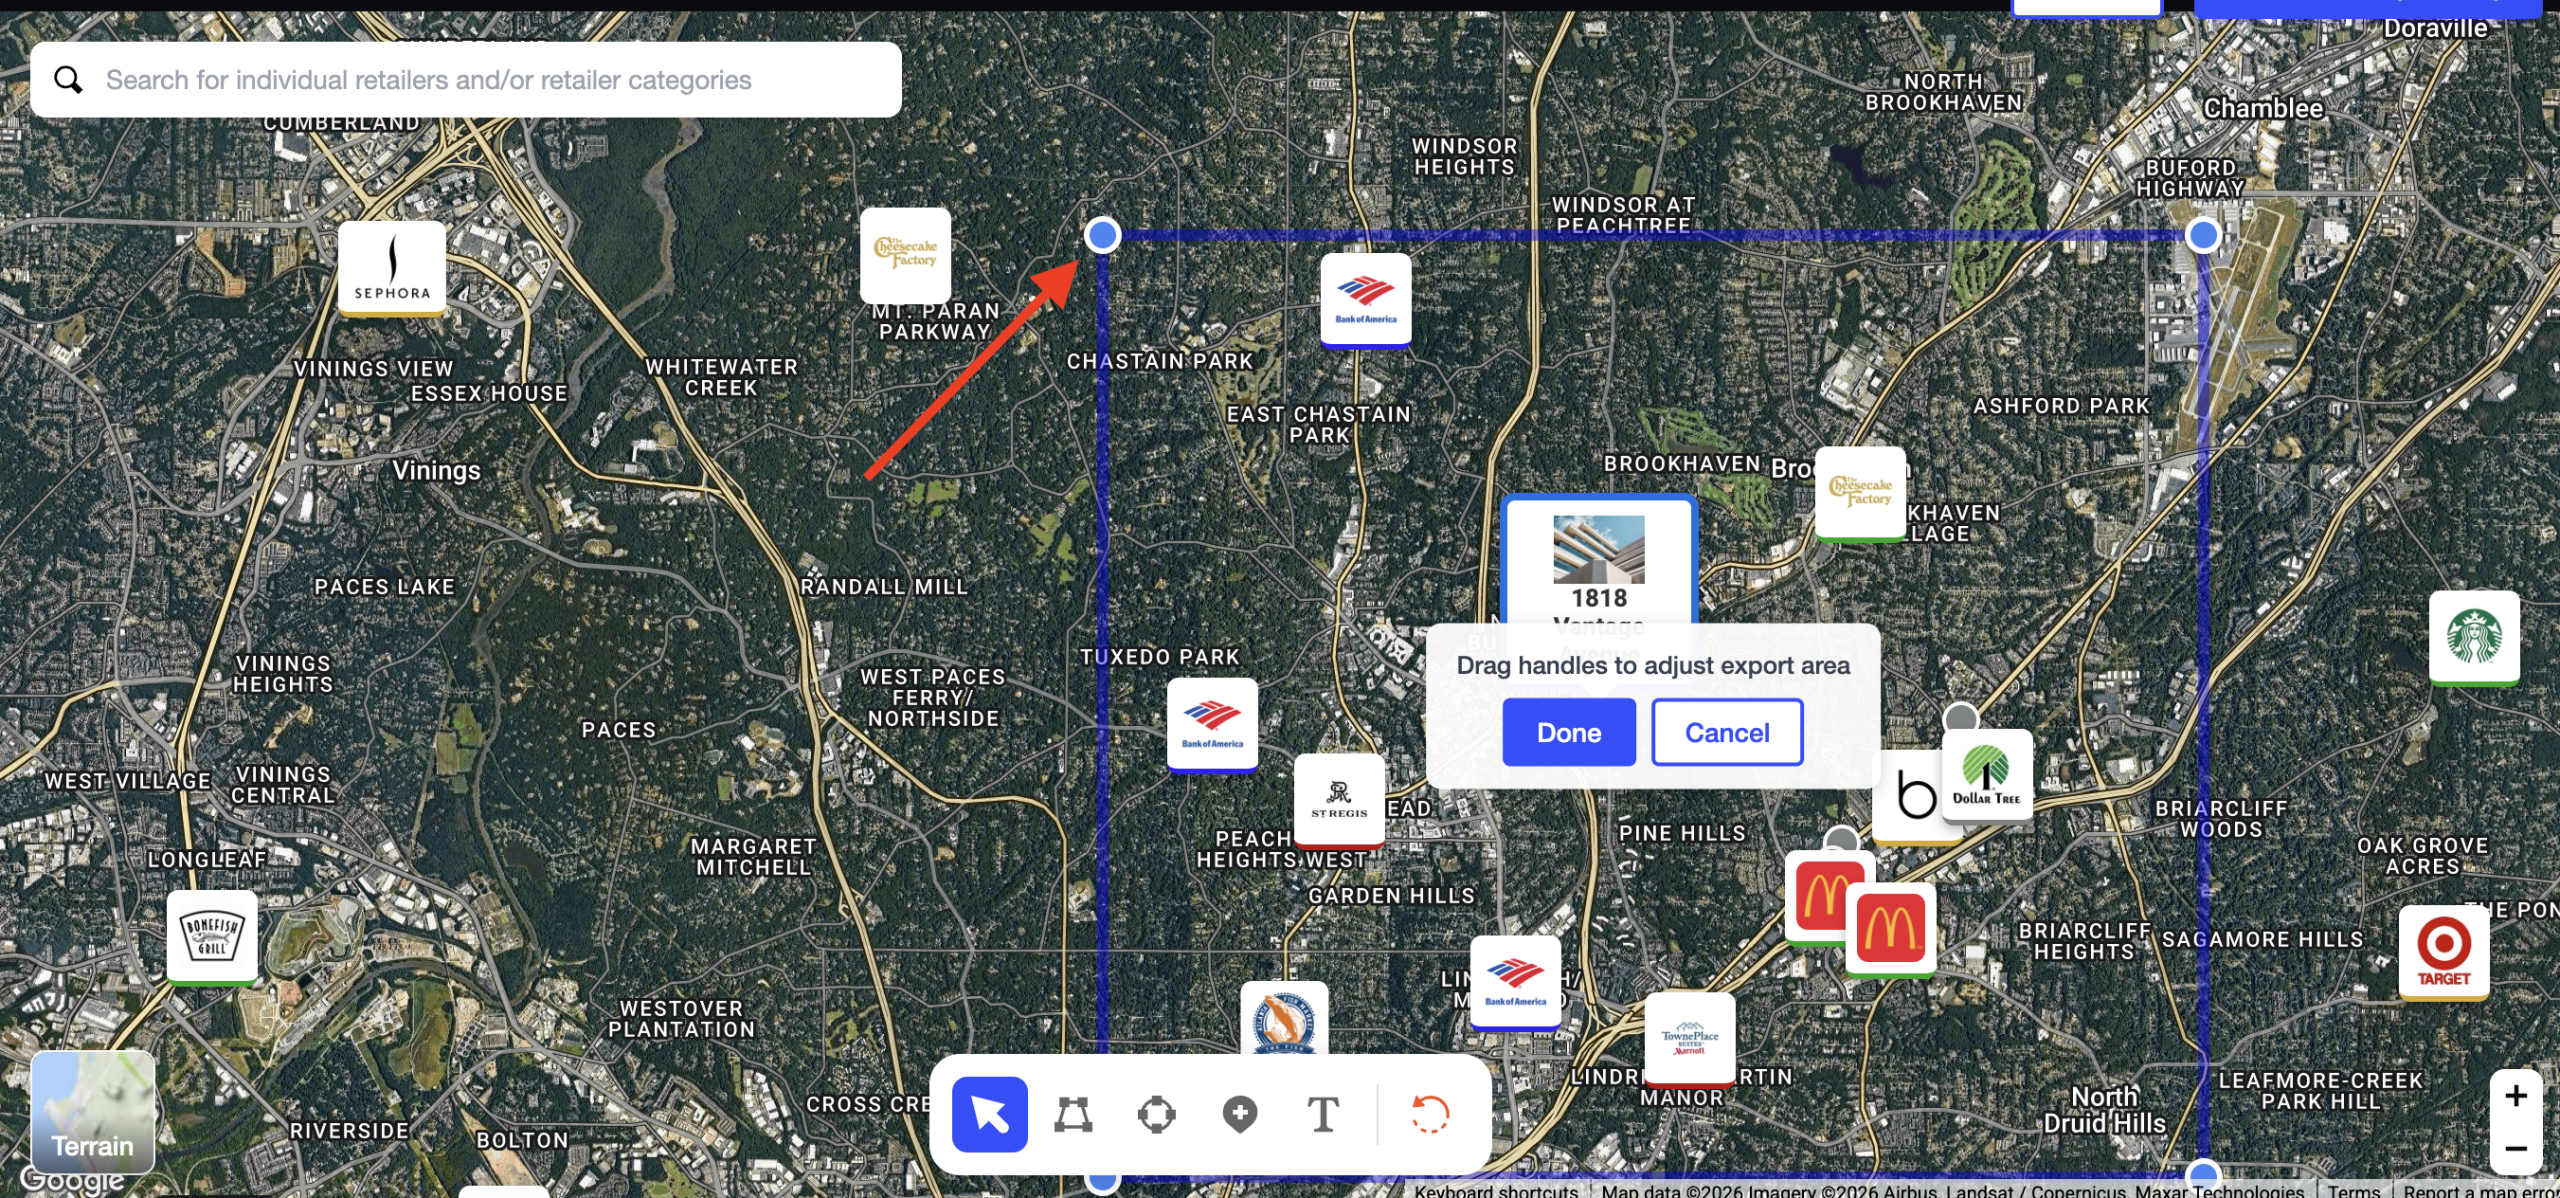
After setting the desired view:
- Click Done
- Save and export the flyer
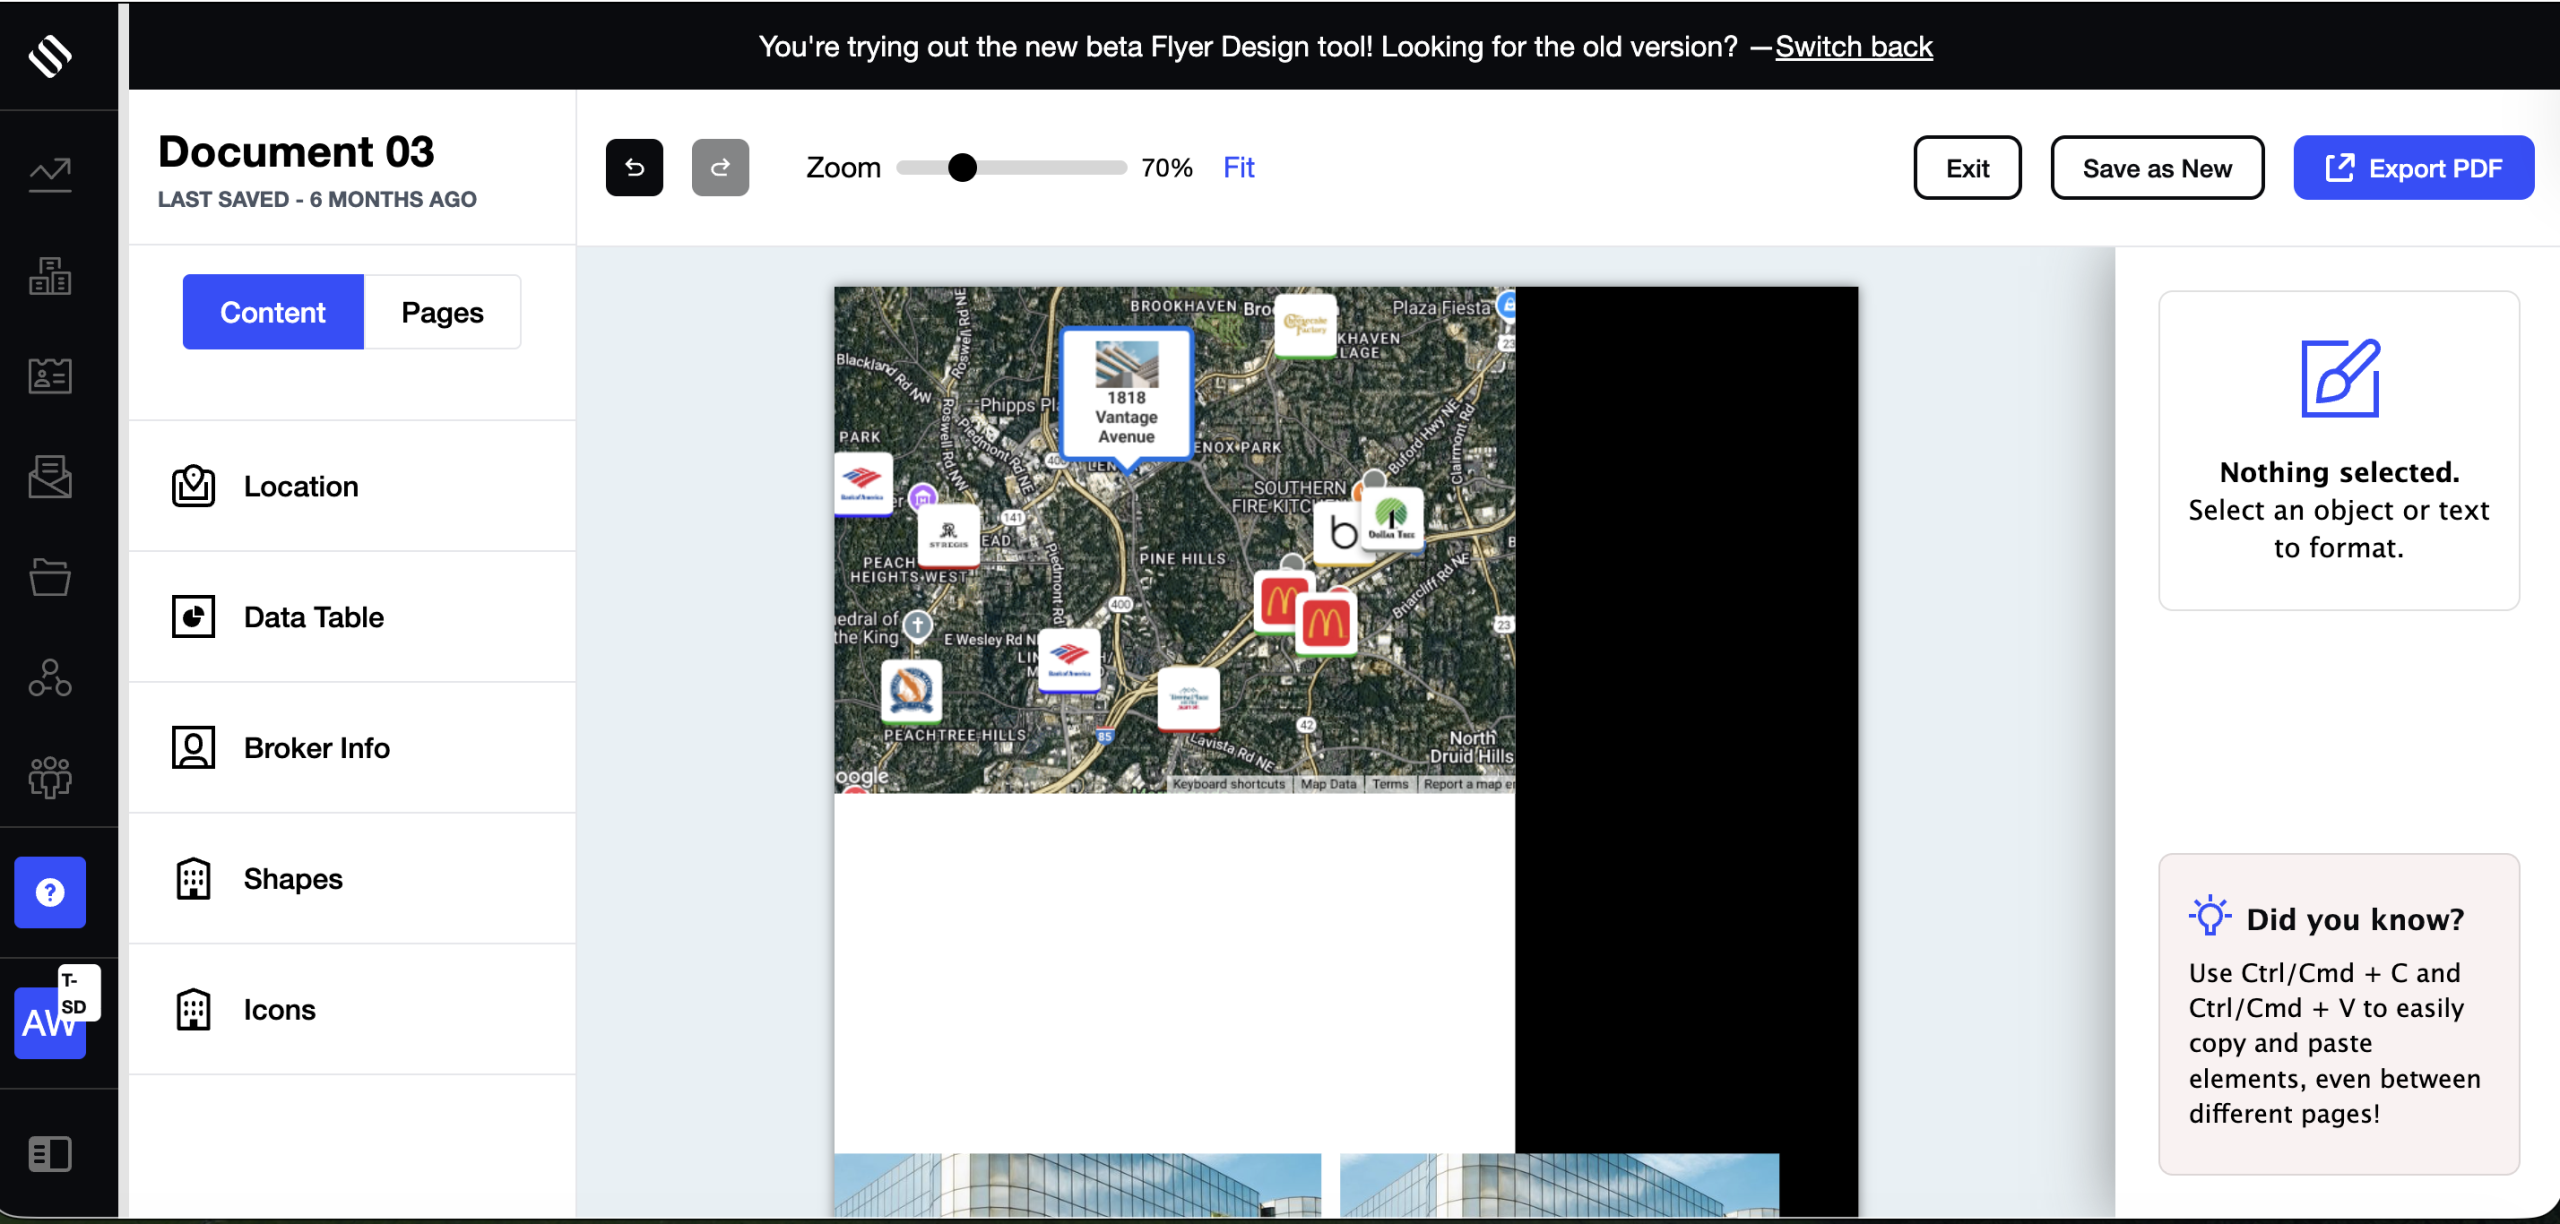
The flyer displays a static image of the map cropped exactly to the selected area, ensuring a clean fit within the layout.
Why Use Interactive Maps?
Interactive Maps help users:
- Present surrounding retailers in a clear, visual format
- Organize complex retail environments into understandable groups
- Maintain consistent use of names, logos, and categories
- Create maps that work seamlessly across websites and printed marketing materials
Typical Workflow
- Access – Open the map from a property website or flyer
- Create – Draw areas, add markers, text, or nearby retailer suggestions
- Group – Merge retailers or create groups manually
- Customize – Control names, logos, categories, and visibility
- Publish – Maps update across property marketing assets
Summary
- Drawing tools for polygons, circles, markers, and text
- Nearby retailer suggestions based on distance from the property
- Flexible retailer grouping and merging
- Detailed control over names, logos, and visibility
- Clean, consistent map visuals for property marketing
Interactive Maps serve as a practical tool for clearly communicating the retail context around a property.