
Global design settings let you set the default look for every flyer your team creates: fonts, colors, text styles and tables. Set them once and new flyers start on-brand, with no reformatting needed.
Applies to: Global admins using the Design Flyer Tool. Admins can’t view or change these settings.
How to open global design settings
There are two ways to open global design settings. Both require a global admin login.
Option 1: From Settings
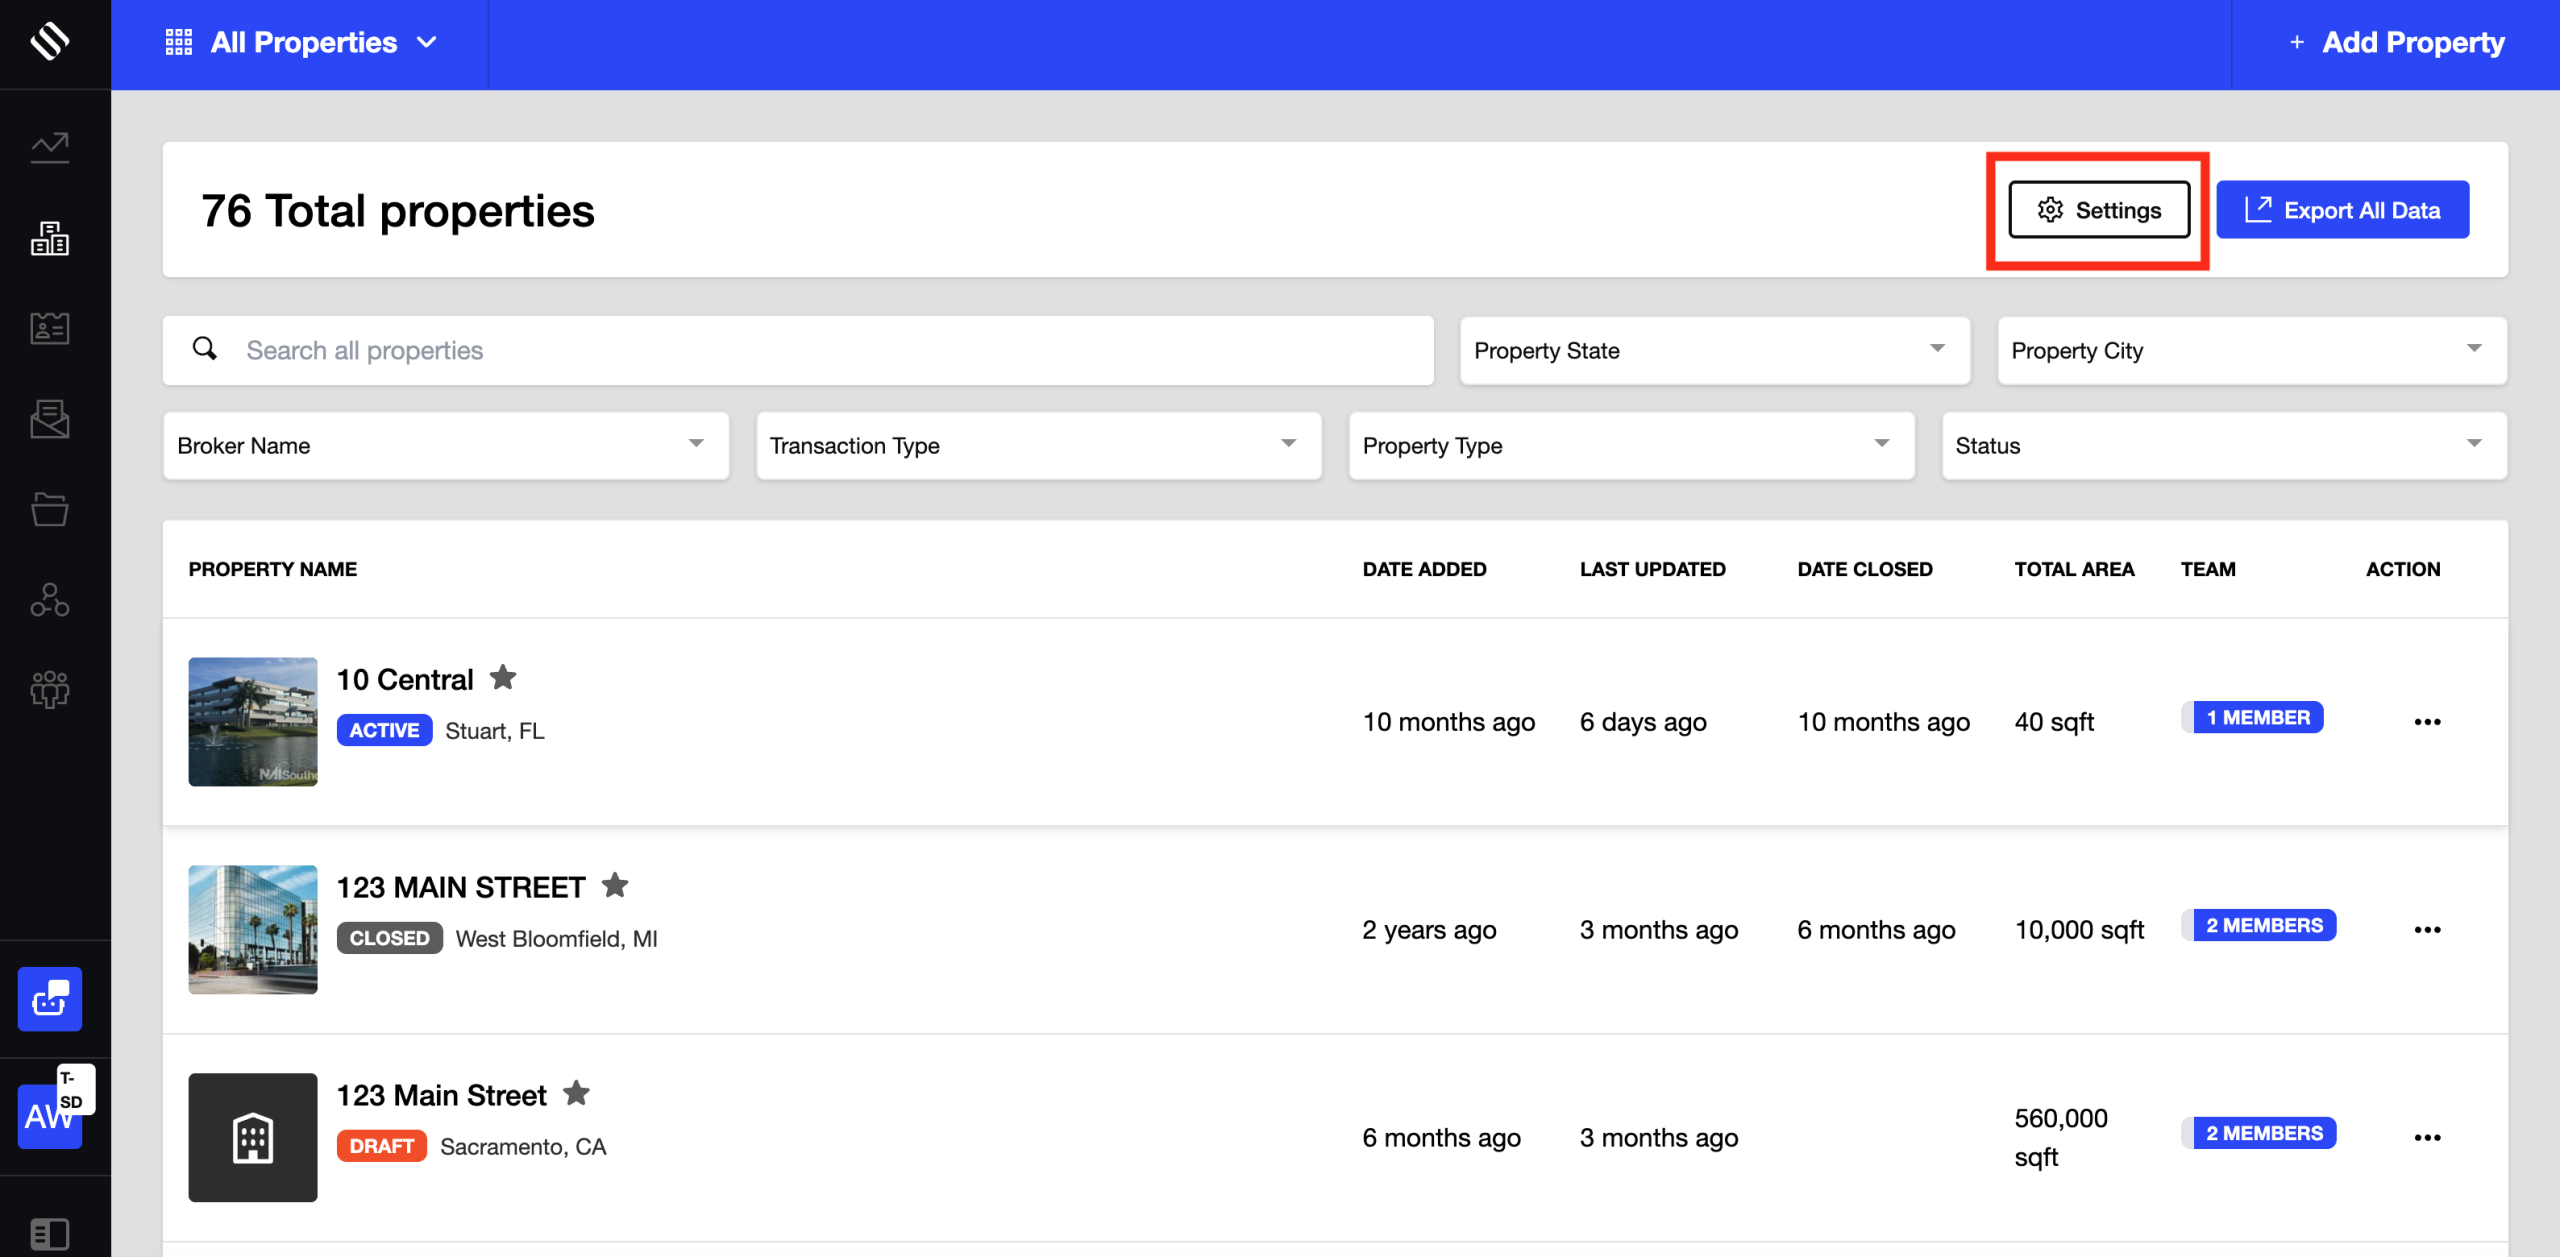
- Log in to your SharpLaunch account as a global admin.
- Go to Properties > Settings > Flyer Tool.
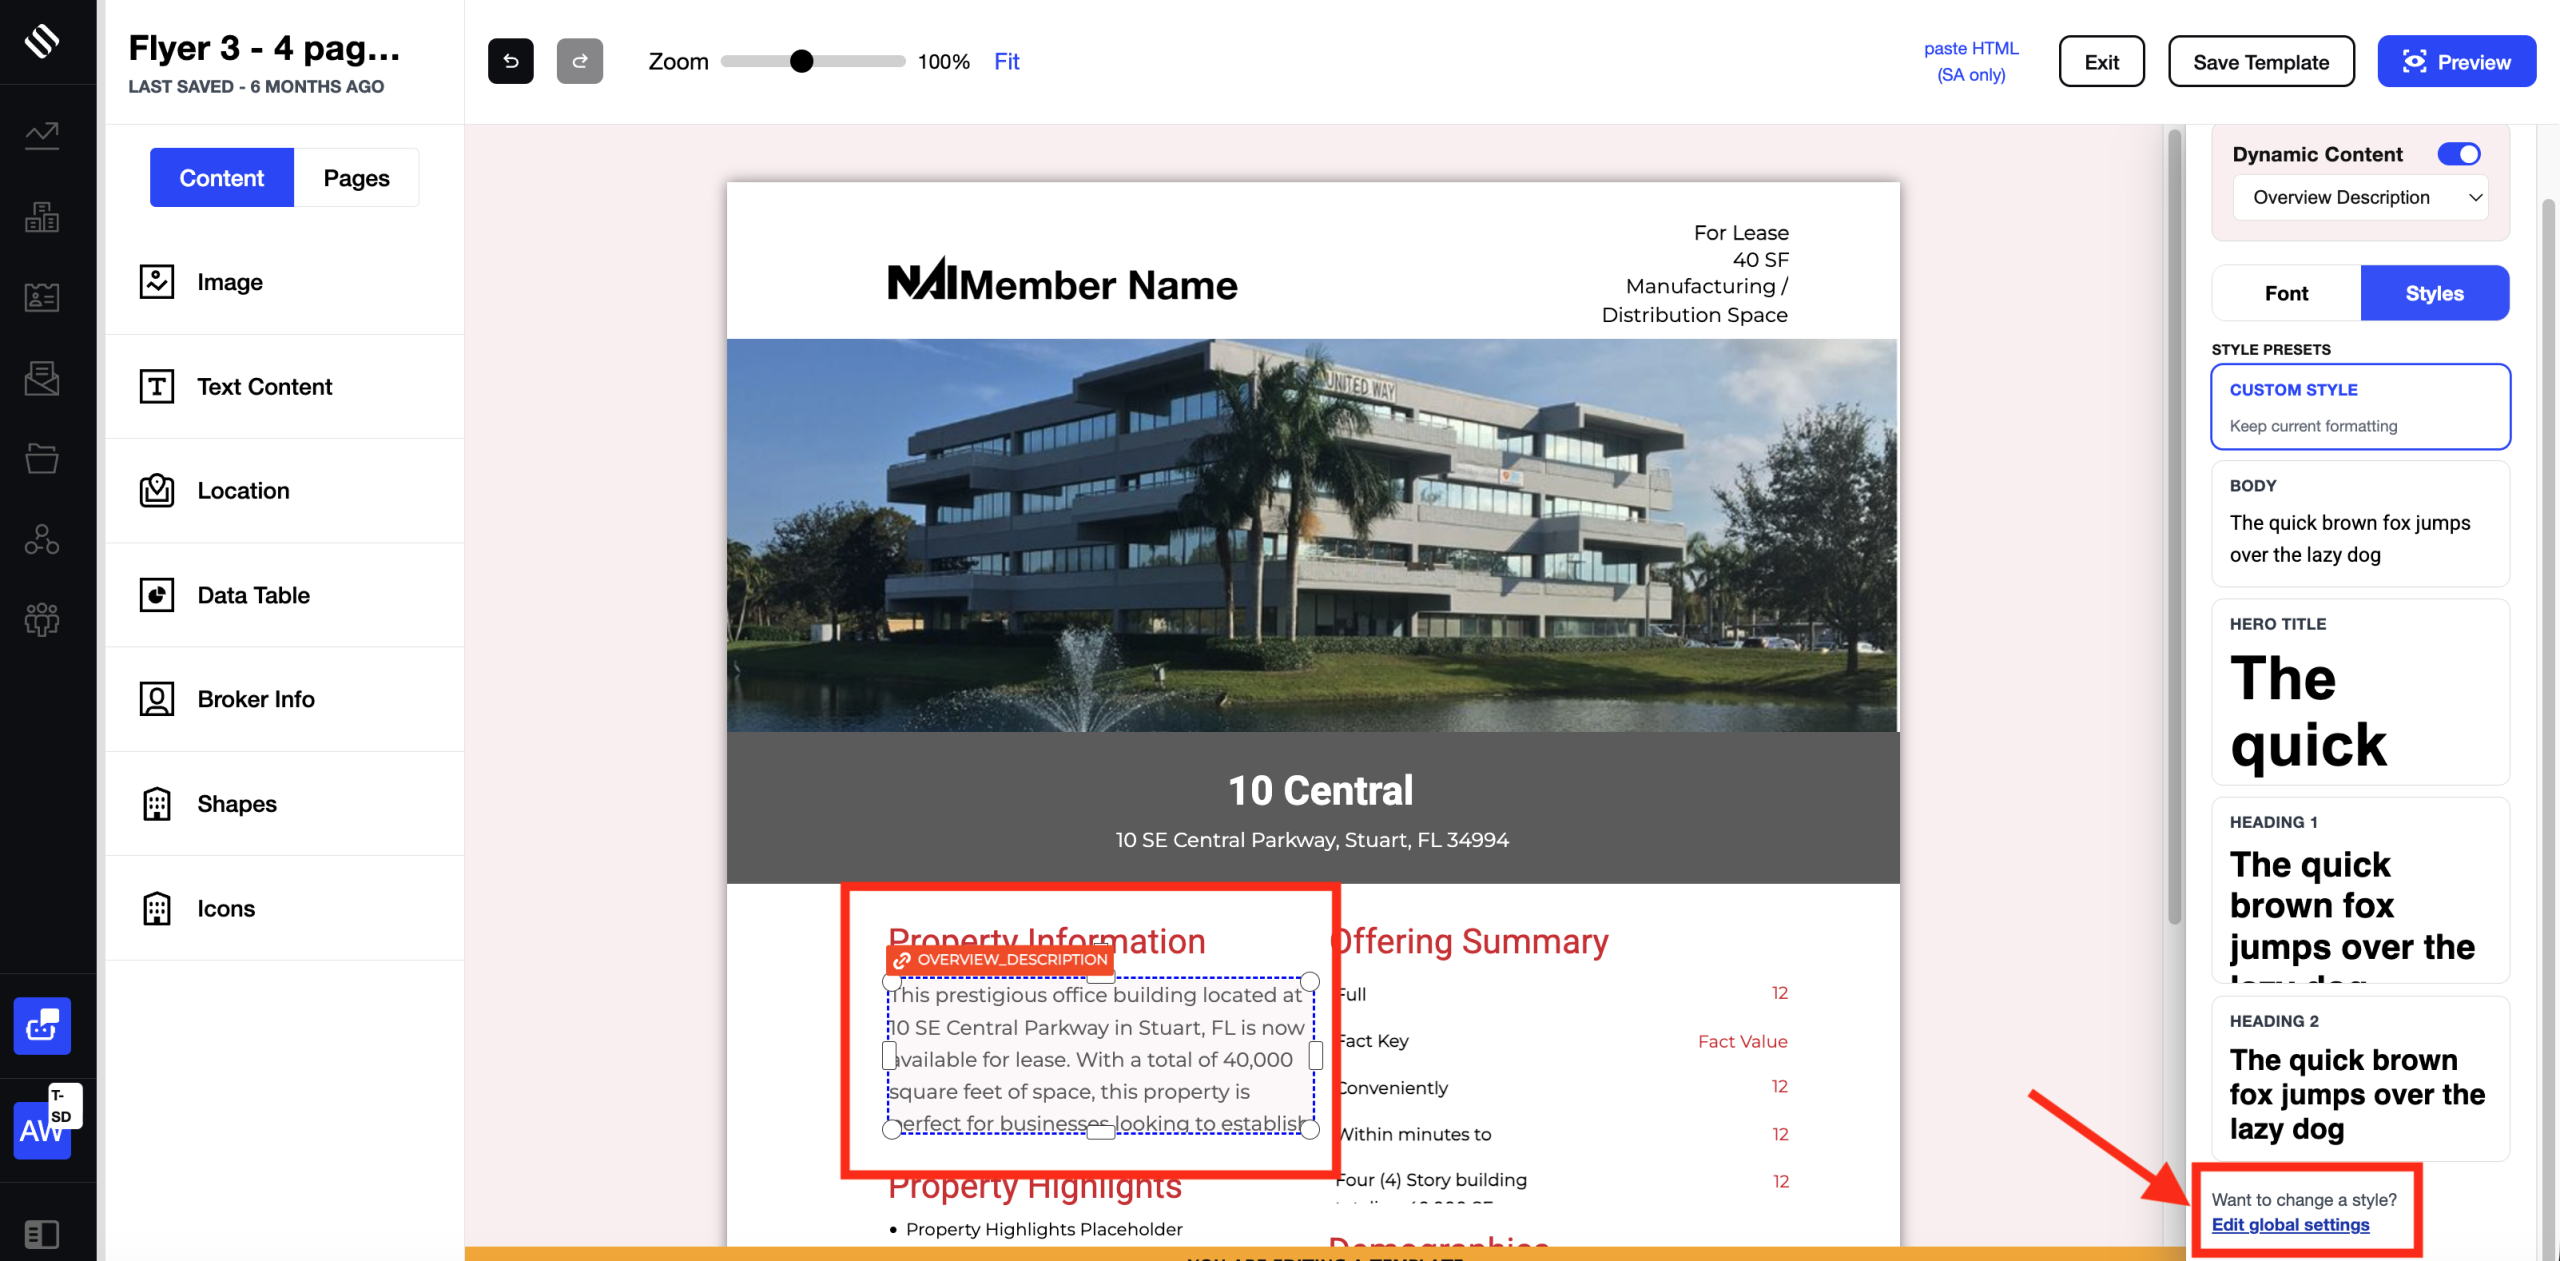
Option 2: From the flyer editor
Global typography
Global typography sets the default text style used across your flyers. There are four settings:
| Setting | What it controls |
|---|---|
| Font family | The typeface used for text |
| Font size | The default text size |
| Line height | The spacing between lines of text |
| Text color | The default color of text |
When the defaults are applied. Global typography is applied automatically when you:
- Create a new flyer
- Add a new content block to a flyer
- Add a new table to a flyer
Which elements use global typography.
| Element type | Includes |
|---|---|
| Free text | Normal text, headings, numbered lists and bullet lists |
| Dynamic text | Mapping tags, dynamic data fields and system-generated text |
| Tables | Demographics, highlights, availabilities and custom tables, including table headers and cell values |
| Broker information | Broker details, contact information and other broker content blocks |
Existing flyers are not changed. Updating global typography only affects content created after the change. Flyers, text blocks and tables that already exist keep their current styling. To update an existing flyer, change its text styles in the flyer editor.
What you see is what you export. Text in the flyer editor matches the exported PDF, including bold, underline and fonts, so you can check your typography defaults directly on the canvas.
Brand colors and the accent color
How the accent color works. A flyer’s accent color comes from your account’s branding. It is re-derived from your brand settings every time a flyer is opened in the editor.
What this means in practice. If you change your brand colors, existing flyers pick up the new accent color the next time someone opens them. You don’t need to update each flyer by hand.
Color controls in the right-hand panel. Color pickers in the right-hand panel are now consistent across the editor, so choosing and reusing your brand colors works the same way wherever you set a color.
Global style presets
Style presets are saved, reusable formats for text and tables. Global admins manage them, and everyone building flyers can apply them.
Types of presets
| Preset type | What it saves |
|---|---|
| Text preset | Typography: font family, font size, line height and text color |
| Table preset | Typography, table colors, border style, border width, border visibility mode, and alternating (striped) row colors |
Applying a preset. In the flyer editor, presets appear as visual preview cards in the sidebar. Select an element, preview the presets, and select one to apply it.
Default preset for new tables. Every new table uses the first available table preset. Make sure the table style you use most is first in the list.
Managing presets. Global admins can manage presets in two places:
- In global settings, at Properties > Settings > Flyer Tool
- In the flyer editor’s template mode, by selecting an element and then Edit global settings
Working with tables
Selecting cells
| To select | Do this |
|---|---|
| One cell | Click the cell |
| A range of cells | Click the first cell, then Shift+click the last cell |
| Several separate cells | Cmd+click (Mac) or Ctrl+click (Windows) each cell |
Editing cell content. Double-click a cell to edit its text directly in the table.
Formatting text in a cell. Select text inside a cell and apply bold, italic or underline.
Formatting the whole table or only some cells
- If no cells are selected, formatting changes apply to the entire table.
- If one or more cells are selected, formatting changes apply only to those cells.
Adding, moving and deleting rows and columns. Right-click a table to open the table menu. The options are:
| Rows | Columns |
|---|---|
| Move row up | Move column left |
| Move row down | Move column right |
| Add row above | Add column before |
| Add row below | Add column after |
| Delete row | Delete column |
Undo, redo and switching pages. When you undo, redo or switch pages while editing a table, your cell selection stays accurate and the table controls display correctly.
Pasting and copying table data
You can move table data between the flyer editor and spreadsheet tools such as Microsoft Excel and Google Sheets, so you don’t have to retype it.
Paste spreadsheet data into an existing table
- Copy the cells in Excel or Google Sheets.
- In the flyer editor, select the table cell where the data should start.
- Paste (Cmd+V on Mac, Ctrl+V on Windows).
The data fills across rows and columns automatically, and the table adds rows or columns as needed to fit it.
Paste spreadsheet data as a new table
- Copy the cells in Excel or Google Sheets.
- In the flyer editor, click an empty area of the canvas (not inside a table).
- Paste.
A new table is created with your data. It uses the first available table preset.
Copy table cells out of a flyer
- Select the cells in the flyer table.
- Copy (Cmd+C on Mac, Ctrl+C on Windows).
- Paste into Excel, Google Sheets or another spreadsheet.
The cells paste as a grid, with rows and columns kept in place.
Recommended size. For best performance, keep tables to 15 columns or fewer. This is a recommendation, not a hard limit.
Table borders and row colors
Select a table to change its borders and row colors in the right-hand panel.
Border modes
| Border mode | What it shows |
|---|---|
| All borders | Lines around every cell |
| Outer borders only | A line around the outside of the table only |
| Inner borders only | Lines between cells, with no outside edge |
| Horizontal borders only | Lines between rows, with no vertical lines |
| Header-only borders | A line under the header row only |
| No borders | No lines at all |
Border style: solid, dashed or dotted.
Border color and border width: set any color and width for the table’s borders.
Alternating row colors (striping): choose one color for even rows and another for odd rows to make long tables easier to read.
To reuse a combination of borders, colors and typography, a global admin can save it as a table preset (see Global style presets above).
Frequently asked questions
Why can’t I see global design settings? Only global admins can view and change global design settings. If you’re an admin, ask a global admin on your team.
I changed the global font, but my existing flyers didn’t update. Why? Global typography only applies to content created after the change: new flyers, new content blocks and new tables. Existing content keeps its styling. Update existing flyers in the flyer editor.
I changed our brand colors. Do I need to update every flyer’s accent color? No. The accent color is re-derived from your branding each time a flyer is opened, so flyers pick up the new color automatically.
Which style does a new table use? New tables use the first available table preset.
How do I add a row or column to a table? Right-click the table and choose Add row above, Add row below, Add column before or Add column after.
How do I format the whole table at once? Make sure no cells are selected, then change the formatting. It applies to the entire table.
Can I paste data from Excel or Google Sheets? Yes. Paste into a selected table cell to fill an existing table, or paste onto an empty area of the canvas to create a new table. Keep tables to 15 columns or fewer for best performance.
Can I copy a flyer table into a spreadsheet? Yes. Select the cells, copy them, and paste into your spreadsheet. They paste as a grid.
How do I lock a table’s position or size? See Locking Elements.